4 Handy Magento Features You’re Probably Not Using

In comparison with most web platforms, Magento is big. Like, really big. The published user guide for the latest Enterprise version – 1.13 – is 545 pages long. It’s safe to say most site owners don’t read such a tome cover to cover, and it’s just as likely a bet that, if you maintain a Magento site, there are options hidden at your fingertips that you haven’t fully leveraged.

It’s not uncommon for a client to come to us with a site tweak they expect to have to pay for, and we’re instead able to show them how they can accomplish it themselves. That’s a satisfying conclusion. Sure, we love getting paying work, but when merchants discover how to get more value from Magento, that becomes a win for everyone!

So if you’re a merchant running Magento, did you know that you can . . .

Tweak Your Catalog Page Layouts

By default, when displaying a product with configurable attributes or custom options, a Magento product page places these elements beneath the top-most columns of product info, moving the Add to Cart button there as well:

This can work well for some product configurations, particularly when there are many such options. Quite often, however, you’ll want your options and “call to action” displayed more prominently above:

A developer will approach this modification ready to dive into layout code and templates. But in this case, “by default” means simply “the default value for a particular product attribute.” More specifically, nestled in the Design tab of every product edit page in Magento’s admin is an attribute called “Display Product Options In,” which defaults to the value “Block after Info Column.” Set it to “Product Info Column” instead, and you get exactly the layout shown in the second screenshot above. (This works as long as your site’s theme hasn’t been too heavily customized.)

This is a particularly dramatic example of a way to modify catalog page appearance from the admin; few settings have as significant an impact on a layout, but there are still other worthwhile ways of tailoring your catalog experience. The System Configuration area of the admin (System -> Configuration from the main menu) contains several. The Catalog section in this area contains a group of settings called Frontend, where you can modify details of your category pages like the number of products per page. The Layered Navigation settings in the same section contain an option for whether to show the count of matching products next to values in your filterable attributes.

For per-product or per-category customizations, every product and category edit page in the admin has a Design (or Custom Design) tab, where you can change the number of columns on the page or even apply an entirely different theme than the rest of the site. And for the adventurous, the same tab contains a Custom Layout Update field where Magento’s XML syntax can be inserted for more dramatic modifications. Learning a bit about this layout XML can be well worth it. (You’re also likely to find snippets for common layout needs with a little searching on the web.) Below is an example that will remove the product page’s mostly useless “Tags” section with a single line (though admittedly this is better suited for a layout file in your theme than being added to every product):

<remove name="product_tag_list" />

Change Standard Text with Translation

It’s easy to disregard translation as something relevant only to a site that supports multiple languages. But have you considered what a useful tool translation can be just to change one bit of text to another? Let’s say you run a site where the phrase “shopping bag” more closely represents your shop’s style than a “shopping cart.” Such text is buried in the site’s template code (likely in many places), but Magento’s translation features can come to the rescue.

Now, the admin does offer a method for configuring translations without touching any site files. It’s called Translate Inline, and it’s to be found in the Developer section of System Configuration. Be warned, however, that this system can be as unwieldy as it is ambitious. Enabling it turns your site into a point-and-click interface for finding the exact text you want to translate and simply typing in its replacement. (This makes it necessary to enter your IP address in the Developer Client Restrictions settings; don’t forget this step on a public site, or else anyone visiting your store will see the translation editing interface!)

By all means, try out Translate Inline for yourself. But if you find the system a bit fiddly for your tastes, know that it’s actually exceedingly straightforward to use Magento’s translation files for the same purpose. Doing so involves the use of a simple CSV file, with not a jot of development knowledge required. To implement a few instances of the “shopping bag” translation described above, I need only create a file called translate.csv with the following contents:

"Add to Cart","Add to Shopping Bag"
"In Cart","In Shopping Bag"
"My Cart","My Shopping Bag"
"My Cart (%s item)","My Shopping Bag (%s item)"
"My Cart (%s items)","My Shopping Bag (%s items)"

That’s it; two pieces of text on every line. The first is the text being translated, and the second is the translated text. Once I have my translate.csv file, I need only FTP it to app/design/frontend/{package}/{theme}/locale/{locale} on my site and clear the Magento cache. (“{locale}” in the preceding path refers to the standard ISO language/region code for your site’s locale. “en_US” would be the code for a typical US English site.)

There’s only one trick to this: Each line must consist of the exact chunk of text passed through Magento’s translator in a particular instance, no more or less. (This is why I cannot simply translate “Cart” to “Shopping Bag.”) So how do you know for sure the exact strings of text you need to deal with? Magento actually makes this very easy by providing an exhaustive set of primed translation files in app/locale/{locale}. Virtually (if not definitely) every snippet of text that’s used in the code can be found in these files. (The filenames provide a good clue about where to find text dealing with certain things, but a good filesystem search tool won’t go amiss.) You can actually edit the translations directly in these files, although the translate.csv file in your theme is generally a better way to go.

You may also be wondering about the “%s” snippet in a couple of my translate lines above. This is a token to be replaced by dynamic information (like the number of items in the cart), but the fact is that it’s not necessary to understand what it’s for. Just make sure your translated text includes the same tokens in the same order, and you’re good to go.

Customize Your Site Emails

All too frequently, a site’s emails don’t get the design love that the browser storefront does. The emails your customers receive when registering for accounts or placing orders are often an afterthought if they’re thought of at all. But emails are an extension of your site’s branding, and a sharp, well thought out design is important to ensure your customers easily absorb the relevant details at a glance.

This one does require some knowledge of HTML to format really good looking emails. Apart from that, while the makeup of Magento’s email templates can be a bit technical, the platform does a great job of setting you up for easy customization. Head to System -> Transactional Emails from the admin main nav and add a new template to see for yourself.

While you’re initially presented with a blank slate, the interface actually requires you to choose a default system template on which to base yours. Choose from the list in the Template dropdown and then Load Template, and the subject and main content fields will immediately be pre-populated with the default code for that email, including all of the needed tokens for dynamic information. If I choose “New Order for Guest,” for example, I’ll already have tokens like “{{var order.increment_id}}” (which outputs the order number in this particular template) to work with in the default content. As long as you leave these tokens in place, you can modify the text and HTML around them to your heart’s content.

In fact, go on and delete those tokens if you like. You can always get them back later, and you won’t even have to load up a new template from scratch to do it. The “Insert Variable…” button immediately above the content field provides a one-click interface for dropping in this kind of info. It contains all the tokens that were defined for the particular template, and some general purpose store information variables too.

There’s one easily missed final step. Once you’ve finished and saved your new transactional email, all you’ve got is a template sitting in the system doing nothing. Sure, you based it on a system template with a particular purpose, but considering that you can create a dozen templates based on “New Order for Guest” if you please, how do you tell Magento which one you actually want to be used?

This is handled in a different area of the admin, which is what may initially trip you up. In fact, the appropriate settings are somewhat scattered around, but all within the System Configuration interface. If you navigate there and take a look at the Sales Emails section, you’ll find the right options for specifying all the major sales related email templates. For the example we’ve been following, look for “New Order Confirmation Template for Guest” under the Order group of settings. The corresponding drop-down lets you choose from any of the transactional email templates you’ve created in the admin.

Some of the more obscure automated emails may take some more digging to find the appropriate place to assign your template, but if you scour the System Configuration sections related to the appropriate features, you should find what you’re looking for. (The Customer Configuration section contains some more of the most common.)

Track Admin Activity

Apologies to merchants on Magento Open Source Edition, but this one is a Magento CommerceE only feature.

However careful a process you may have for managing your site’s configuration and content, problems are going to occur sometimes. And far be it from me to suggest that when they do, you’ll want to find someone to blame! Nevertheless, knowing exactly what has changed between the time your site was running beautifully and the moment the home page layout blew up is probably going to be the best way to fix things fast. Especially when you have a team of multiple people managing your store, the Admin Actions Log can be a valuable tool.

To view a record of activity, navigate to System -> Admin Actions Log -> Report. The resulting list shows the date/time and username for every action taken in the admin. Take special note that all actions are logged here, not just changes; just navigating the admin and viewing settings and content will be tracked, so note the Action column for the specific type. The Action Group column details what admin area was involved, and the Full Action Name and Short Details Columns contain further detail (such as the ID of a product that was viewed or edited).

When you view a particular log, the results can be a bit cryptic, but helpful nevertheless. Here’s what one log looked like after I edited a product’s details:

Note that price is the only attribute the system bothered to record a “Value Before Change” for, indicating this is the attribute I modified. You won’t always find the information quite as detailed (a System Configuration change, for instance, seems to record no information about which values changed), but the Admin Actions Log puts you in a much better position to track down offending changes than you’d be in without it.

If you’re already using these tools, pat yourself on the back! And then spend some time poking around the Magento admin to discover what useful settings you haven’t found yet.

Boost your reviews: Amazon-style review emails on Magento

Amazon.com is the king of product reviews. If you are shopping for a product and want to see what others have to say about it, chances are, you turn to Amazon.com. Studies show that more product reviews = higher conversion rates and more organic traffic. Amazon has set a high bar: customers expect product reviews, especially for products they are not familiar with.

As an eCommerce merchant, how do you increase the number of reviews on your site? The answer is simple: ask for them. Sure, you probably have the standard “Write a review” link on your product detail pages, but do you proactively ask your customers for their feedback?

One of our Clients, tools4flooring.com, recently asked us to help them increase the number of reviews on their site. We took inspiration from Amazon’s approach to asking for reviews. We built a simple email that shows customers their recently purchased products and gives them the ability to jump-start the review process by clicking on a star.

We setup the tools4flooring.com site to send this email template to customers 21 days after purchase. This feature has been live for about 3 months and the results have been great:

3 months prior to sending review emails:

  • 4 new customer reviews

3 months after sending review emails:

  • 102 new customer reviews (3% of customers)
  • $1,795 in revenue generated from customers coming from review email

Rather than building the functionality from scratch, we based it on top of the Aheadworks Follow Up extension. It allowed us to quickly and easily build out the desired functionality.

If you have enabled reviews on your site but your products don’t have many reviews, I would recommend exploring an option like this. And you can always take it a step further by offering coupon codes or reward points for your customers who leave reviews.

Contact us if you are interested in boosting your reviews.

The Most Common Complaint from Magento Merchants

As an agency, we have the privileged position of hearing many, many merchants talk about what causes them the most pain. Over the years, we’ve heard plenty of complaining, for sure, but mostly, we’ve heard really great feedback and totally legitimate challenges for merchants on the Magento platform.

Many of these challenges have been addressed as the Magento product and community evolves and matures, but there has been one persistent complaint that hasn’t been sufficiently addressed yet: Magento support when you need it without having to make a continuous financial commitment. Classy Llama is super excited about our new Llama Desk service because it solves this plague of a problem. The Magento ecosystem just became a much friendlier place because there are llamas at every turn, ready to serve!

Llama Desk is a pay-as-you-need-it service. This means that you don’t have to pay for a block of hours until after you send your ticket directly to the Llama Desk team. With the elimination of project management and a first-come, first-serve mentality, we can provide you with quick and easy access to highly experienced, certified Magento developers.

Llama Desk was born because of a need that we didn’t see being fulfilled in the market. We’re amped about this service because it’s going to give merchants who need on-the-fly support a llama to carry them where they need to go.

Thank you for all of the input we’ve received to date to make the service rock!

Classy Llama Starts in A Garage in 2007… Hits #454 on Inc. 500 in 2013

As I’m sure you’re aware, Inc. publishes a list annually of the 500 fastest-growing private companies in America. Classy Llama made the list coming in at #454, and I speak for the whole team when I say that we are very humbled by the journey we’ve had the privilege to travel.

Classy Llama started in 2007 with 3 guys working in my garage. At the time, I was also working on starting up two other companies. When these petered out, I focused full-time on Classy Llama. Revenue tripled in the last half of 2009 and the ensuing jump from 5 to 10 employees made our under-heated, under-cooled garage untenably small. Revenue grew more than 500% YOY in 2010 alone with our headcount at about 20 by the end of the year!

Even in the midst of this crazy growth, we were able to effectively serve a high-demand, limited-supply niche: eCommerce design and development on the Magento platform. While we have made mistakes along the way, we have always followed through for the client and done our best to honor the people we work with. Our goal is to continue meeting the needs and providing value to our clients as a full-service eCommerce agency. Thanks to everyone who has helped us get to where we are today!

~Kurt

Save Credit Cards in Magento with Our New PayPal Extension

Classy Llama’s newly released PayPal Credit Card Tokenization extension adds a feature to Magento that’s been sorely missed by merchants who use PayPal as their payment service of choice: the ability for customers to save a credit card for repeated use. The enhancement has the potential to make PayPal a more attractive option for new merchants choosing an online payment solution as well.

With the extension in place on a Magento site using PayPal, logged in or registering customers will now be presented with a “Save this card for future use” check box when paying with a credit card. On subsequent visits, any previously saved cards will be available for one-click use. And while this is the most prominent feature of the new extension, it offers quite a few other bells and whistles as well, including support for billing agreements on a Payflow gateway integration and new options for re-charging previous payment methods for site admins.

The best thing about the new extension is that it’s absolutely free. It’s also incredibly easy to install via the Magento Connect marketplace:

http://www.magentocommerce.com/magento-connect/catalog/product/view/id/18715/s/paypal-credit-card-tokenization-extension-4490/

(Please note that you must be running Magento Open Source 1.7.0.2 or above, or Commerce 1.12.0.2 or above, to use the extension.)

Saved Credit Cards?

If you’re thinking that the ability to save a credit card on an eCommerce site hardly sounds revolutionary, you’re quite correct. It also may not be apparent what this has to do with using PayPal for your payment processing. This all comes down to the fact that credit card information isn’t being stored directly on the web site at all.

It is perfectly possible, of course, for any site to store credit card data directly; Magento includes the ability to save credit cards in an encrypted manner out of the box. But actually storing credit card data presents security concerns that merely passing it to a payment gateway does not, and the stringent added security measures required by PCI Data Security Standards are often too difficult or costly for many merchants.

Both PayPal and Authorize.Net have for some time offered solutions that allow for the customer experience of saved credit cards without requiring merchants to bear the burden of storing the sensitive data. The key is the ability to store and use tokens that merely reference information stored securely on the providers’ own servers. The bad news for Magento merchants is that, to date, no support for either payment service’s tokenization features has been included in the core platform. A handful of paid third-party extensions have been developed to enable the option for Authorize.Net, but no equivalent off-the-shelf PayPal solution has existed until now. (And we’d be remiss if we didn’t remind you that this extension is free!)

Features

Here’s a more in-depth look at the PayPal Credit Card Tokenization extension’s features.

PCI Compliant Saved Credit Cards

Customers can save their credit card information during the checkout process and then use the same credit card on future orders. No sensitive information is stored on the merchant site, eliminating PCI DSS compliance concerns.

Billing Agreement Enhancements

PayPal billing agreements are already supported in Magento and allow customers to automatically charge their PayPal accounts on future orders, or allow merchants to automatically bill a PayPal customer at specific intervals (for products like subscriptions). However, billing agreements have not previously been supported for Payflow gateway integrations. The new extension adds this support, and billing agreements can now be created during Express Checkout even for guest or registering customers, for use with the new admin order management features.

Admin Order Management

Merchants now have the ability to create orders in the Magento admin interface that charge the same credit card or PayPal billing agreement used on any previous order. The admin interface can also now be used to create “guest” orders – that is, orders not associated with a specific registered site user.

Compatibility

The extension is compatible with Magento Community 1.7.0.2 and above, and Enterprise 1.12.0.2 and above.

Integrations with the following PayPal solutions are supported:

  • Payments Pro
  • Payments Advanced
  • Payflow Pro
  • Payflow Link
  • Express Checkout

The Road Ahead

This is an extension we intend to improve as demand for other features becomes apparent. Currently, the most requested addition is compatibility with earlier versions of Magento. If you’re a merchant running a Magento release that’s not currently supported, rest assured that you won’t be left out in the cold forever. Plans are already underway to back-port the extension. Keep checking our blog for updates!

Unravelling Magento’s collectTotals: An Example

Previous Entries

In the previous entries in this series, we’ve dived into the process Magento uses for calculating and displaying cart totals. With this conclusion, we’ll walk through an example of a new total collector, step by step.

I’ll re-emphasize that collectTotals can be useful to you in more ways than one. Implementing a new total collector can serve various purposes. For a complete example, however, I’ll focus on the most straightforward application: Creating a new, distinct total to be added to and displayed alongside the rest.

Not being an online merchant with a truly legitimate use case for such a customization, I’ll have to settle for dreaming up a half-baked scenario of my own. Let’s say I run the website Cozy Crafts, where I sell my own hand-crafted items. An important offering of my site is the ability for the customer to give instructions for customizing my products, beyond the typical scenarios of monograms or color choices. To keep it simple, I’m just going to present a custom option textarea where customers can enter their instructions, and I will apply a flat surcharge for customization per SKU (not per item), but increasing the flat fee for greater quantities.

Okay, so perhaps it’s not the soundest way to structure my pricing, but it serves well enough as a justification for a “custom surcharge” total. Keeping our example as simple as possible, we’ll assume that for products where customization is available, I’ll simply create a separate version of the product with “-CUSTOM” appended to the SKU. Customers wishing to give customization instructions will place this version of the item in their cart.

I’ll start with the complete config.xml for our module:

<?xml version="1.0"?>
<config>
    <modules>
        <CozyCrafts_CustomSurcharge>
            <version>1.0.0</version>
        </CozyCrafts_CustomSurcharge>
    </modules>
    <global>
        <blocks>
            <cozycraft_surcharge>
                <class>CozyCrafts_CustomSurcharge_Block</class>
            </cozycraft_surcharge>
        </blocks>
        <models>
            <cozycraft_surcharge>
                <class>CozyCrafts_CustomSurcharge_Model</class>
                <resourceModel>cozycraft_surcharge_resource</resourceModel>
            </cozycraft_surcharge>
            <cozycraft_surcharge_resource>
                <class>CozyCrafts_CustomSurcharge_Model_Resource</class>
            </cozycraft_surcharge_resource>
        </models>
        <helpers>
            <cozycraft_surcharge>
                <class>CozyCrafts_CustomSurcharge_Helper</class>
            </cozycraft_surcharge>
        </helpers>
        <resources>
            <cozycraft_surcharge_setup>
                <setup>
                    <module>CozyCrafts_CustomSurcharge</module>
                </setup>
            </cozycraft_surcharge_setup>
        </resources>
        <fieldsets>
            <sales_convert_quote_address>
                <base_custom_surcharge_amount>
                    <to_order>*</to_order>
                </base_custom_surcharge_amount>
                <custom_surcharge_amount>
                    <to_order>*</to_order>
                </custom_surcharge_amount>
            </sales_convert_quote_address>
            <sales_convert_quote_item>
                <base_custom_surcharge_amount>
                    <to_order_item>*</to_order_item>
                </base_custom_surcharge_amount>
                <custom_surcharge_amount>
                    <to_order_item>*</to_order_item>
                </custom_surcharge_amount>
            </sales_convert_quote_item>
        </fieldsets>
        <sales>
            <quote>
                <totals>
                    <custom_surcharge>
                        <class>
                            cozycraft_surcharge/sales_quote_address_total_customsurcharge
                        </class>
                        <after>subtotal</after>
                        <renderer>
                            cozycraft_surcharge/checkout_total_customsurcharge
                        </renderer>
                    </custom_surcharge>
                </totals>
            </quote>
            <order_invoice>
                <totals>
                    <custom_surcharge>
                        <class>
                            cozycraft_surcharge/sales_order_invoice_total_customsurcharge
                        </class>
                        <after>subtotal</after>
                    </custom_surcharge>
                </totals>
            </order_invoice>
            <order_creditmemo>
                <totals>
                    <custom_surcharge>
                        <class>
                            cozycraft_surcharge/sales_order_creditmemo_total_customsurcharge
                        </class>
                        <after>subtotal</after>
                    </custom_surcharge>
                </totals>
            </order_creditmemo>
        </sales>
    </global>
    <frontend>
        <layout>
            <updates>
                <cozycrafts_customsurcharge>
                    <file>cozycrafts_customsurcharge.xml</file>
                </cozycrafts_customsurcharge>
            </updates>
        </layout>
    </frontend>
    <adminhtml>
        <layout>
            <updates>
                <cozycrafts_customsurcharge>
                    <file>cozycrafts_customsurcharge.xml</file>
                </cozycrafts_customsurcharge>
            </updates>
        </layout>
    </adminhtml>
</config>

The relevant bits, starting from the top:

  • The “fieldsets” node is responsible for making sure values from our new database fields get transferred from quote to order.
  • Our surcharge totals, along with their model classes, are defined in the “global/sales/quote/totals”, “global/sales/order_invoice/totals” and “global/sales/order_creditmemo/totals” nodes. Note the use of <after> to position our collector’s calculations directly after the subtotal collector. We also define <renderer> in the quote node, because we will be using a custom block for our total in the cart and checkout.

The next step is to add the database fields for our total on the appropriate tables. We’ll be adding the same two fields – “custom_surcharge_amount” and “base_custom_surcharge_amount” – to the following tables: sales_flat_quote_item, sales_flat_quote_address_item (used for multi-shipping), sales_flat_quote_address, sales_flat_order_item, sales_flat_order, sales_flat_invoice and sales_flat_creditmemo. (It would be common to add these fields to sales_flat_invoice_item and sales_flat_creditmemo_item as well, but we are avoiding this in our example for simplicity.) Here is a snippet from the setup script located in our module at sql/cozycraft_surcharge_setup/install-1.0.0.php, which would be repeated for both fields and for all tables:

$installer->getConnection()
    ->addColumn($installer->getTable('sales/quote_address'), 
            'base_custom_surcharge_amount', 
            array(
                'type' => Varien_Db_Ddl_Table::TYPE_DECIMAL,
                'length' => '12,4',
                'nullable'  => true,
                'comment' => 'Base Custom Surcharge',
            )
     );

Next we’ll look at our surcharge quote total model:

class CozyCrafts_CustomSurcharge_Model_Sales_Quote_Address_Total_Customsurcharge 
    extends Mage_Sales_Model_Quote_Address_Total_Abstract
{
    protected $_surchargeTiers = array(
        0 => 10,
        5 => 20,
        15 => 30,
    );
    
    public function __construct()
    {
        $this->setCode('custom_surcharge');
    }
}

Our model extends Mage_Sales_Model_Quote_Address_Total_Abstract. Here, we’ve set up the quantity tiers for our surcharge. (For example, if we have between 5 and 14 of a custom product in our cart, a single surcharge of $20 will be applied.) In our constructor, we set the total code on the model, matching the code we used in config.xml.

So far, we’ve let Magento know where to find our total model and when to use it in the sequence of totals collection. Immediately after the “collect” method is run on the subtotal collector model, the same method will be called on ours. Here is the code that will execute:

public function collect(Mage_Sales_Model_Quote_Address $address)
{
    parent::collect($address);
    
    foreach ($this->_getAddressItems($address) as $item) {
        if (preg_match('/-CUSTOM$/', $item->getSku())) {
            $this->_applyItemSurcharge($item);
        }
    }

    return $this;
}

protected function _applyItemSurcharge($item)
{
    $baseSurcharge = 0;
    foreach ($this->_surchargeTiers as $tier => $amt) {
        if ($item->getQty() < $tier) {
            break;
        }
        $baseSurcharge = $amt;
    }

    $surcharge = Mage::app()->getStore()->convertPrice($baseSurcharge);
    
    $item->setBaseCustomSurchargeAmount($baseSurcharge);
    $item->setCustomSurchargeAmount($surcharge);
    
    $this->_addBaseAmount($baseSurcharge);
    $this->_addAmount($surcharge);
}

The “collect” method accepts an instance of Mage_Sales_Model_Quote_Address, and our call to the parent method ensures this is set on our model (which is important for the _addAmount methods). From the address, we get the collection of items and apply our surcharge to each that matches the “-CUSTOM” suffix on the SKU. Applying our surcharge involves setting both custom_surcharge and base_custom_surcharge on the item, as well as using the built-in _addBaseAmount and _addAmount, which will take care of setting the appropriate fields on the address and summing them with the rest of its totals.

With this much in place, we’re ready to test adding a custom product to our cart. We should see the surcharge reflected in our grand total when we do (though not itself displayed – that comes next). A look at the sales_flat_quote_address and sales_flat_quote_item tables will show the appropriate values have been saved on the quote records. Next is the total model’s “fetch” method:

public function fetch(Mage_Sales_Model_Quote_Address $address)
{
    $amount = $address->getCustomSurchargeAmount();
    if ($amount!=0) {
        $address->addTotal(array(
                'code' => $this->getCode(),
                'title' => Mage::helper('cozycraft_surcharge')
                    ->__('Custom Surcharge'),
                'value' => $amount
        ));
    }
    return $this;
}

Recall that “fetch” is called on each total model during the execution of Mage_Checkout_Block_Cart_Totals::renderTotals. No calculations are being done here; those already took place in “collect.” Rather, we are simply returning an array with our total’s code and a title and value to display.

If we hadn’t defined a custom renderer block in config.xml, this would be all that’s needed to make sure our total shows up along with the others. Since we did, we have a bit more to do. Here’s our block, which actually exists merely to define the separate template used to display our surcharge:

class CozyCrafts_CustomSurcharge_Block_Checkout_Total_Customsurcharge 
    extends Mage_Checkout_Block_Total_Default
{
    protected $_template = 'cozycraft_surcharge/checkout/total/surcharge.phtml';
}

And here is the template, which we’ve customized from the default by adding some styling and including a link that will open a pop-up window with an explanation of our surcharge:

<tr style="color:#f00;" >
    <th colspan="<?php echo $this->getColspan(); ?>" 
        style="<?php echo $this->getTotal()->getStyle() ?>" 
        class="a-right">
        <?php if ($this->getRenderingArea() 
            == $this->getTotal()->getArea()): ?>
            <strong>
        <?php endif; ?>
        <?php echo $this->escapeHtml(
                $this->getTotal()->getTitle()
        ); ?><br />
        <a style="font-size:10px" 
            href="<?php echo Mage::helper('cozycraft_surcharge')->getInfoUrl() ?>"
            class="new-window">
            <?php echo Mage::helper('cozycraft_surcharge')
                ->__('Why do we charge this fee?')?>
        </a>
        <?php if ($this->getRenderingArea() 
            == $this->getTotal()->getArea()): ?>
            </strong>
        <?php endif; ?>
    </th>
    <td style="<?php echo $this->getTotal()->getStyle() ?>" 
        class="a-right">
        <?php if ($this->getRenderingArea() 
            == $this->getTotal()->getArea()): ?>
        <strong>
        <?php endif; ?>
        <?php echo $this->helper('checkout')
            ->formatPrice($this->getTotal()->getValue()) ?>
        <?php if ($this->getRenderingArea() 
            == $this->getTotal()->getArea()): ?>
        </strong>
        <?php endif; ?>
    </td>
</tr>

Now we can see our total displayed in the cart. The following is what is shown when we have 2 of one custom product (for a surcharge of $10) and 5 of another (for a surcharge of $20) in the cart:

The “fieldset” nodes we saw in config.xml will take care of transferring the surcharge from the quote items to the order items and from the quote address to the order itself. For the surcharge to actually be displayed in order confirmation emails and in the admin, we’ll have to complete our layout update piece, but before doing so we’ll look at the respective invoice and credit memo total models as well.

For invoicing, we decide to use the following rule: For each order item, we will invoice the full surcharge amount only once the fullquantity has been invoiced. A strategy like this would typically make tracking our surcharge amount on a per item basis a good idea, but we’re going to content ourselves with tracking it only on the entire invoice. Here’s our invoice total class. (Note the use of our own logic for determining if it’s the last invoice rather than relying on “isLast”, as alluded to in the previous article regarding invoices and credit memos.)

class CozyCrafts_CustomSurcharge_Model_Sales_Order_Invoice_Total_Customsurcharge 
    extends Mage_Sales_Model_Order_Invoice_Total_Abstract
{
    public function collect(Mage_Sales_Model_Order_Invoice $invoice)
    {
        $invoice->setCustomSurchargeAmount(0);
        $invoice->setBaseCustomSurchargeAmount(0);

        // Get any amount we've invoiced already
        $prevInvoiceCustomSurchargeAmt = 0;
        $prevInvoiceBaseCustomSurchargeAmt = 0;
        foreach ($invoice->getOrder()->getInvoiceCollection() as $prevInvoice) {
            if ($prevInvoice->getCustomSurchargeAmount() && !$prevInvoice->isCanceled()) {
                $prevInvoiceCustomSurchargeAmt += $prevInvoice->getCustomSurchargeAmount();
                $prevInvoiceBaseCustomSurchargeAmt += $prevInvoice->getBaseCustomSurchargeAmount();
            }
        }

        $customSurchargeAmt = 0;
        $baseCustomSurchargeAmt = 0;
        $invoiceIsLast = true;
        foreach ($invoice->getAllItems() as $item) {
            $orderItem = $item->getOrderItem();
            if ($orderItem->isDummy()) {
                continue;
            }

            if (!$item->isLast()) {
                $invoiceIsLast = false;
            }

            $orderItemQty = $orderItem->getQtyOrdered();
            $orderItemPrevInvoiced = $orderItem->getQtyInvoiced();

            // If invoicing the last quantity of this item, invoice the surcharge
            if (($orderItemPrevInvoiced + $item->getQty()) == $orderItemQty) {
                $customSurchargeAmt += $orderItem->getCustomSurchargeAmount();
                $baseCustomSurchargeAmt += $orderItem->getBaseCustomSurchargeAmount();
            }
        }
        // Just to be safe, if this is the last invoice, override with the full remaining surcharge amount
        if ($invoiceIsLast) {
            $customSurchargeAmt = $invoice->getOrder()->getCustomSurchargeAmount() - $prevInvoiceCustomSurchargeAmt;
            $baseCustomSurchargeAmt = $invoice->getOrder()->getBaseCustomSurchargeAmount() - $prevInvoiceBaseCustomSurchargeAmt;
        }

        $invoice->setCustomSurchargeAmount($customSurchargeAmt);
        $invoice->setBaseCustomSurchargeAmount($baseCustomSurchargeAmt);

        $invoice->setGrandTotal($invoice->getGrandTotal()+$customSurchargeAmt);
        $invoice->setBaseGrandTotal($invoice->getBaseGrandTotal()+$baseCustomSurchargeAmt);

        return $this;
    }
}

Finally, we need to deal with credit memo calculation. Our logic for refunds is even simpler than for invoices: We’ll consider our surcharge non-refundable unless the entire order has been refunded. (What we’d likely want in a similar real life scenario is for the administrator to be able to choose whether to refund this amount or not on the final credit memo, but this would require some customization to the admin form itself. And of course, if we simply want the surcharge to be non-refundable in all cases, there’s no need for a total model at all.) Our credit memo total model:

class CozyCrafts_CustomSurcharge_Model_Sales_Order_Creditmemo_Total_Customsurcharge 
    extends Mage_Sales_Model_Order_Creditmemo_Total_Abstract
{
    public function collect(Mage_Sales_Model_Order_Creditmemo $creditmemo)
    {
        $creditmemo->setCustomSurchargeAmount(0);
        $creditmemo->setBaseCustomSurchargeAmount(0);

        // Just to be safe, get any amount we've refunded already (shouldn't be possible!)
        // so we can make sure we don't refund more than was charged
        $prevCreditmemoCustomSurchargeAmt = 0;
        $prevCreditmemoBaseCustomSurchargeAmt = 0;
        foreach ($creditmemo->getOrder()->getCreditmemosCollection() as $prevCreditmemo) {
            if ($prevCreditmemo->getCustomSurchargeAmount() && ($prevCreditmemo->getState() != Mage_Sales_Model_Order_Creditmemo::STATE_CANCELED)) {
                $prevCreditmemoCustomSurchargeAmt += $prevCreditmemo->getCustomSurchargeAmount();
                $prevCreditmemoBaseCustomSurchargeAmt += $prevCreditmemo->getBaseCustomSurchargeAmount();
            }
        }

        $allowedAmount          = $creditmemo->getOrder()->getCustomSurchargeAmount() - $prevCreditmemoCustomSurchargeAmt;
        $baseAllowedAmount      = $creditmemo->getOrder()->getBaseCustomSurchargeAmount() - $prevCreditmemoBaseCustomSurchargeAmt;

        // Loop through items to find out if this is the last credit memo
        $creditmemoIsLast = true;
        foreach ($creditmemo->getAllItems() as $item) {
            $orderItem = $item->getOrderItem();
            if ($orderItem->isDummy()) {
                continue;
            }

            if (!$item->isLast()) {
                $creditmemoIsLast = false;
                break;
            }
        }

        // Only if the entire order has been refunded, refund the surcharge
        if ($creditmemoIsLast) {
            $creditmemo->setCustomSurchargeAmount($allowedAmount);
            $creditmemo->setBaseCustomSurchargeAmount($baseAllowedAmount);

            $creditmemo->setGrandTotal($creditmemo->getGrandTotal()+$allowedAmount);
            $creditmemo->setBaseGrandTotal($creditmemo->getBaseGrandTotal()+$baseAllowedAmount);
        }

        return $this;
    }
}

All that’s left from here is to define the block class that will handle displaying our total for orders, invoices, and credit memos, and to add it to the appropriate areas in layout XML.

Thankfully, we can use the same class for all three cases. With the block’s “getSource” method, we’ll fetch the source model from the parent block, which may be an order, invoice, or credit memo. Our total amount is fetched from any of the three with the same method, so we won’t care which is being returned.

class CozyCrafts_CustomSurcharge_Block_Sales_Order_Totals_Customsurcharge 
    extends Mage_Core_Block_Abstract
{
    public function getSource()
    {
        return $this->getParentBlock()->getSource();
    }

    /**
     * Add this total to parent
     */
    public function initTotals()
    {
        if ((float)$this->getSource()->getCustomSurchargeAmount() == 0) {
            return $this;
        }
        $total = new Varien_Object(array(
            'code'  => 'custom_surcharge',
            'field' => 'custom_surcharge_amount',
            'value' => $this->getSource()->getCustomSurchargeAmount(),
            'label' => $this->__('Custom Surcharge')
        ));
        $this->getParentBlock()->addTotalBefore($total, 'shipping');
        return $this;
    }
}

Our layout XML is going to be lengthy. It’s one little block, but it needs to be added in a lot of places. At least we can define each of our layout updates once and then apply them multiple times with a single line. Here’s the front-end version of cozycrafts_customsurcharge.xml:

<?xml version="1.0"?>
<layout version="0.1.0">
    <cozycrafts_customsurcharge_add_order_total>
        <reference name="order_totals">
            <block type="cozycraft_surcharge/sales_order_totals_customsurcharge" name="total_custom_surcharge" />
        </reference>
    </cozycrafts_customsurcharge_add_order_total>

    <cozycrafts_customsurcharge_add_invoice_total>
        <reference name="invoice_totals">
            <block type="cozycraft_surcharge/sales_order_totals_customsurcharge" name="total_custom_surcharge" />
        </reference>
    </cozycrafts_customsurcharge_add_invoice_total>

    <cozycrafts_customsurcharge_add_creditmemo_total>
        <reference name="creditmemo_totals">
            <block type="cozycraft_surcharge/sales_order_totals_customsurcharge" name="total_custom_surcharge" />
        </reference>
    </cozycrafts_customsurcharge_add_creditmemo_total>

    <sales_order_view>
        <update handle="cozycrafts_customsurcharge_add_order_total" />
    </sales_order_view>
    <sales_order_invoice>
        <update handle="cozycrafts_customsurcharge_add_invoice_total" />
    </sales_order_invoice>
    <sales_order_creditmemo>
        <update handle="cozycrafts_customsurcharge_add_creditmemo_total" />
    </sales_order_creditmemo>
    <sales_order_print>
        <update handle="cozycrafts_customsurcharge_add_order_total" />
    </sales_order_print>
    <sales_order_printinvoice>
        <update handle="cozycrafts_customsurcharge_add_invoice_total" />
    </sales_order_printinvoice>
    <sales_order_printcreditmemo>
        <update handle="cozycrafts_customsurcharge_add_creditmemo_total" />
    </sales_order_printcreditmemo>
    <sales_email_order_items>
        <update handle="cozycrafts_customsurcharge_add_order_total" />
    </sales_email_order_items>
    <sales_email_order_invoice_items>
        <update handle="cozycrafts_customsurcharge_add_invoice_total" />
    </sales_email_order_invoice_items>
    <sales_email_order_creditmemo_items>
        <update handle="cozycrafts_customsurcharge_add_creditmemo_total" />
    </sales_email_order_creditmemo_items>
    <sales_guest_view>
        <update handle="cozycrafts_customsurcharge_add_order_total" />
    </sales_guest_view>
    <sales_guest_invoice>
        <update handle="cozycrafts_customsurcharge_add_invoice_total" />
    </sales_guest_invoice>
    <sales_guest_creditmemo>
        <update handle="cozycrafts_customsurcharge_add_creditmemo_total" />
    </sales_guest_creditmemo>
    <sales_guest_print>
        <update handle="cozycrafts_customsurcharge_add_order_total" />
    </sales_guest_print>
    <sales_guest_printinvoice>
        <update handle="cozycrafts_customsurcharge_add_invoice_total" />
    </sales_guest_printinvoice>
    <sales_guest_printcreditmemo>
        <update handle="cozycrafts_customsurcharge_add_creditmemo_total" />
    </sales_guest_printcreditmemo>
</layout>

And here’s the admin version:

<?xml version="1.0"?>
<layout version="0.1.0">
    <cozycrafts_customsurcharge_add_order_total>
        <reference name="order_totals">
            <block type="cozycraft_surcharge/sales_order_totals_customsurcharge" name="total_custom_surcharge" />
        </reference>
    </cozycrafts_customsurcharge_add_order_total>

    <cozycrafts_customsurcharge_add_invoice_total>
        <reference name="invoice_totals">
            <block type="cozycraft_surcharge/sales_order_totals_customsurcharge" name="total_custom_surcharge" />
        </reference>
    </cozycrafts_customsurcharge_add_invoice_total>

    <cozycrafts_customsurcharge_add_creditmemo_total>
        <reference name="creditmemo_totals">
            <block type="cozycraft_surcharge/sales_order_totals_customsurcharge" name="total_custom_surcharge" />
        </reference>
    </cozycrafts_customsurcharge_add_creditmemo_total>

    <adminhtml_sales_order_view>
        <update handle="cozycrafts_customsurcharge_add_order_total" />
    </adminhtml_sales_order_view>
    <adminhtml_sales_order_invoice_new>
        <update handle="cozycrafts_customsurcharge_add_invoice_total" />
    </adminhtml_sales_order_invoice_new>
    <adminhtml_sales_order_invoice_updateqty>
        <update handle="cozycrafts_customsurcharge_add_invoice_total" />
    </adminhtml_sales_order_invoice_updateqty>
    <adminhtml_sales_order_invoice_view>
        <update handle="cozycrafts_customsurcharge_add_invoice_total" />
    </adminhtml_sales_order_invoice_view>
    <adminhtml_sales_order_creditmemo_new>
        <update handle="cozycrafts_customsurcharge_add_creditmemo_total" />
    </adminhtml_sales_order_creditmemo_new>
    <adminhtml_sales_order_creditmemo_updateqty>
        <update handle="cozycrafts_customsurcharge_add_creditmemo_total" />
    </adminhtml_sales_order_creditmemo_updateqty>
    <adminhtml_sales_order_creditmemo_view>
        <update handle="cozycrafts_customsurcharge_add_creditmemo_total" />
    </adminhtml_sales_order_creditmemo_view>
</layout>

And with that, our module is complete. We’ve successfully applied our own custom surcharge to the cart and made sure it makes it through to the final cart. After seeing the complexity of the code Magento implements to handle totals, the volume of code we actually had to write to implement our own actually doesn’t seem half bad!

I hope this series has done something to bolster your confidence in dealing with the totals collection process. The more you deal with it, the less you’ll dread those times when a client’s requirements involve customizing totals, and the less readily you’ll resort to a hack when a new total collector might be just the thing to save the day!

Unravelling Magento’s collectTotals: Orders and Caveats

Previous Entries

The focus of this series is Magento’s process for calculating and displaying cart totals. We have taken a thorough look at the code involved with the core process, but there are a few important points left to cover.

Transferring totals to the order

What we’ve seen so far all relates to what’s happening when a cart is still in progress, and it makes sense that that’s where the truly hard work is done. But at some point (we hope), a cart will become an order. What happens then? There are several relevant points:

  • Frequently, the same database fields we’ve seen in the quote tables (ex. “gift_cards_amount” and “base_gift_cards_amount”) will show up in the order tables as well.
  • Where these fields are present in sales_flat_quote_item, you’ll most likely see them duplicated on sales_flat_order_item as well.
  • As we’ve seen, the most common pattern is for a cumulative total to be stored on sales_flat_quote_address. But observing the order tables will reveal that most such fields have moved directly to sales_flat_order. This makes sense. During the cart process, it’s important for calculations to be done on an address level, since address info can affect things like tax and shipping. Once an order has been placed, all that’s relevant is the final total that was, in fact, applied.
  • With the appropriate fields present on the order tables, making sure the data makes it from the quote to the order is actually accomplished very simply in a module’s config.xml (see below).
  • The display of totals in an order confirmation email and in the admin order screens bears little resemblance to the process for displaying them in the cart. The block Mage_Sales_Block_Order_Totals and its descendants are involved.

In a quick examination of config.xml in Mage_Sales, you’ll see the node “fieldset” defined with a slew of information about the fields that should be copied from quote to order or vice versa. The following shows the info relevant to copying discount data:

<global>
    <fieldsets>
        . . .
        <sales_convert_quote_address>
            . . .
            <discount_amount>
                <to_order>*</to_order>
            </discount_amount>
            . . .
            <base_discount_amount>
                <to_order>*</to_order>
            </base_discount_amount>
            . . .
        </sales_convert_quote_address>
        . . .
        <sales_convert_quote_item>
            . . .
            <discount_amount>
                <to_order_item>*</to_order_item>
            </discount_amount>
            <base_discount_amount>
                <to_order_item>*</to_order_item>
            </base_discount_amount>
            . . .
        </sales_convert_quote_item>
        . . .
    </fieldsets>
    . . .
</global>

That’s all there is to it. With no more work than that, totals data is copied from quote to order. Note the fields that are being copied from quote_address directly to order (rather than order_address).

Finally, on the subject of displaying order totals: The process is unfortunately not as graceful as we’ve seen in the cart (where the setting of display order in the admin, the fetch method on the total models, and the ability to set custom renderers afforded us a great deal of flexibility). Mage_Sales_Block_Order_Totals (used itself for totals in order confirmation emails) defines the method _initTotals, where total values are retrieved directly from the order and accumulated in an array. The choice of totals to be included is entirely hard-coded. Mage_Adminhtml_Block_Sales_Totals and its descendants (Mage_Adminhtml_Block_Sales_Order_Totals, Mage_Adminhtml_Block_Sales_Order_Creditmemo_Totals and Mage_Adminhtml_Block_Sales_Order_Invoice_Totals) make their own modifications to this method. For customization in this area, we’ll have to resort to block rewriting.

UPDATE: Thanks to Vinai Kopp for correcting me on that last part. He pointed out what I missed: Mage_Sales_Block_Order_Totals calls initTotals on any of its child blocks that have such a method, which can in turn grab their parent and call addTotal or addTotalBefore to modify the totals array, thus eliminating the need for block rewrites.

An unexpected caveat of collectTotals: Quote item caching

Obviously, we’ve taken a fairly high level view of the code involved with collectTotals. You’re highly encouraged to dig into the code yourself and discover the fine details. There is one such detail, however, that I feel is well worth covering here, to prevent it tripping you up.

Now that you understand what occurs during the totals collection process, you may find it convenient or necessary to call it directly yourself. Before you start feeling too confident with using collectTotals for your own purposes, though, keep the following rule in mind:

Products cannot be added to the quote after collectTotals is run!

. . . unless the quote addresses’ item caches are cleared.

Nearly every total model’s “collect” method relies on fetching the quote items from the address and looping through them. The first time getAllItems is run on a quote address, the item collection is actually cached with a unique key, and it’s this cached collection that is returned on subsequent calls.

This presents no problem for the quote items that already existed. Their totals will be processed and modified as usual. But new quote items that have been added aren’t part of the cached collection. The result: The new quote items will be saved all right, because they were successfully added to the quote’s real item collection, but you’ll find $0 in every field where you expect to see a calculated total, and you’ll pull your hair out trying to figure out why!

That concludes our exploration of the details of collectTotals. However, we’re not done yet! Since doing can be much more instructive than observing, the final part in this series will contain a complete walkthrough for adding a total collector of your own to your site.

Next entries

Unravelling Magento’s collectTotals: The Core Process

Previous entries

In this series, we’re looking at Magento’s process for calculating and displaying totals for a cart. In our introduction, we briefly covered what a “total” or “total collector” is and saw how one is defined in config.xml. Now it’s time to take a closer look at the models and data structure involved. The job of a total collector model can be divided into two processes: Calculation and display.

You’re highly encouraged to open up the Magento codebase and follow along with the referenced code.

The collectTotals process

As mentioned in the previous article, the calculation of cart totals is kicked off with a call to Mage_Sales_Model_Quote::collectTotals. Before taking a look at the code, there are a few things to take note of about the underlying data structure for totals:

  • While it’s not required, many totals have database fields dedicated to them – usually “totalname_amount” and “base_totalname_amount” for the store and base currencies. (Ex., “gift_cards_amount” and “base_gift_cards_amount”)
  • Since totals calculations are done on each individual quote address, these fields are typically in sales_flat_quote_address, and there are methods for automatically adding to these amounts and incorporating them into the quote address’s total.
  • It’s not uncommon for fields of the same name to exist in sales_flat_quote_address_item and be managed directly by the total collector.
  • There are no restrictions on what values a particular total collector can modify. Example: The “subtotal” collector modifies several values, including “price” and “row_total” on quote items.
  • sales_flat_quote does contain “subtotal” and “grand_total,” which are special in that collectTotals automatically takes care of populating them after all total collectors have run.

With that out of the way, it’s time to examine the general flow of execution for collectTotals. collectTotals is run at various points, almost always immediately before the quote is saved. Examples would include during a visit to the cart page, upon the submission of each step during the checkout, and immediately before final order placement. Here’s a truncated version of collectTotals, with the main areas of code we’re concerned with:

    public function collectTotals()
    {
        /**
         * Protect double totals collection
         */
        if ($this->getTotalsCollectedFlag()) {
            return $this;
        }

        . . .

        foreach ($this->getAllAddresses() as $address) {
            $address->setSubtotal(0);
            $address->setBaseSubtotal(0);

            $address->setGrandTotal(0);
            $address->setBaseGrandTotal(0);

            $address->collectTotals();

            $this->setSubtotal((float) $this->getSubtotal() 
                + $address->getSubtotal());
            $this->setBaseSubtotal((float) $this->getBaseSubtotal() 
                + $address->getBaseSubtotal());

            $this->setSubtotalWithDiscount(
                (float) $this->getSubtotalWithDiscount() 
                    + $address->getSubtotalWithDiscount()
            );
            $this->setBaseSubtotalWithDiscount(
                (float) $this->getBaseSubtotalWithDiscount() 
                    + $address->getBaseSubtotalWithDiscount()
            );

            $this->setGrandTotal((float) $this->getGrandTotal() 
                + $address->getGrandTotal());
            $this->setBaseGrandTotal((float) $this->getBaseGrandTotal() 
                + $address->getBaseGrandTotal());
        }

        . . .

        $this->setTotalsCollectedFlag(true);
        return $this;
    }

The parts I’ve truncated deal with dispatching events, zeroing out values before the process begins, validation, and setting item quantities on the quote. Here’s an explanation of the main collection process:

  • Mage_Sales_Model_Quote::collectTotals loops through each quote address and calls Mage_Sales_Model_Quote_Address::collectTotals.
  • In collectTotals for an address, getTotalCollector()->getCollectors is used to get a sorted array of the defined total models and loop through them.
  • The “collect” method is run on each total model (all of which extend Mage_Sales_Model_Quote_Address_Total_Abstract). This method accepts the address as a parameter and does the heavy lifting of totals calculation.
    • The logic almost always involves looping through the address’s quote items via _getAddressItems. The handy methods _addAmount and _addBaseAmount can be used to add to the value of a field on the address matching the name of the total collector (like “discount_amount”), which will also add to the grand total for the address.
    • Any modification to the values on the quoted address itself is done here as well.
  • In Mage_Sales_Model_Quote::collectTotals, subtotal and grand_total are accumulated from the totals on each address.
  • With few exceptions, the quote (and by extension its addresses and items) is immediately saved after collectTotals is run.

To re-emphasize, no price information exists on the quote at all until this process has run the first time. When a product is added to the cart, it is added without price info, and the appropriate price is looked up and applied in one of the total collectors.

It may seem strange that totals are collected for both shipping and billing addresses on a quote and then summed. First of all, it’s appropriate for calculations to be done in the context of a specific address, because address information may affect things like tax and shipping. But if the two addresses’ totals are added together, how can the result be correct? The key is in _getAddressItems on the total model, which will return items only for the relevant address. (Typically the shipping address, or the billing address on a virtual quote.) Thus you end up with $0 totals on the address for which no items are returned. And for multi-shipping, quote items are explicitly associated with one address or another, which makes the general collectTotals process work out nicely.

Displaying totals

The process for calculating totals on a quote may still seem a bit opaque, but if you spend some time examining the various total models defined in the core, the general functionality should begin to click. There’s one other key component to a total model, however: Displaying totals in the cart or checkout (or wherever). It’s not required for a total to be displayed, but totals like “subtotal,” “discount,” “tax” and “grand_total” should be itemized on the page.

You’ve seen that collectTotals on the quote model and “collect” on a total model are the key methods involved with calculating and saving info. For displaying, getTotals on the quote model and “fetch” on the total model comprise the main event. Here’s the basic process:

  • Mage_Checkout_Block_Cart_Totals is the block included in the layout. The corresponding template outputs the results of renderTotals on this block.
  • Mage_Checkout_Block_Cart_Totals::renderTotals loops through the results of the block’s own getTotals method, which in turn calls Mage_Sales_Model_Quote::getTotals.
  • As comes as no surprise at this point, a getTotals method is called on each quote address. And parallel with the process we saw with collection, getTotalCollector()->getRetrievers is used to get the sorted total models. (This is distinct from getCollectors. In this case, admin configuration can actually be used to dictate the order in which totals are displayed.)
  • The “fetch” method is called on each total model, once again with the address passed as a parameter.
    • Ultimately, this method calls addTotal on the quote address, passing an array with the total’s code, a display title, and the value to display.
    • What is ultimately stored on the quote address is an instance of Mage_Sales_Model_Quote_Address_Total, which is a Varien_Object with an added “merge” method to facilitate summing the values of two such objects.
  • As Mage_Sales_Model_Quote::getTotals loops through each address, it uses the “merge” method mentioned above to reconcile each address’s data for a particular total into one final set of information to display.
  • Finally, Mage_Checkout_Block_Cart_Totals::renderTotals calls renderTotal for each total, which instantiates the appropriate block (more on this in a moment) and returns the results of toHtml.

Exactly which block class is used to render a specific total is determined as follows:

  • A block can be defined directly in layout XML for any total. It should simply have the name “{totalcode}_total_renderer,” and this block will be used to render the corresponding total.
  • If no renderer is defined in layout, the next place checked is the global config XML. We’ve already seen where totals are defined (in the node path “global/sales/quote/totals”). The node for a specific total can define <renderer> in addition to <class>, <before> and <after>. The expected value is a block code. An example can be found in config.xml for Mage_Checkout, where the renderer “checkout/total_nominal” is specified for the “nominal” total.
  • If neither of the above defined a renderer, the default Mage_Checkout_Block_Total_Default is used.

And there you have it! The collection and display processes are as simple as that. All right, so “simple” may not be the word to describe them. But with the outlines above, you should be well equipped to examine the code of the various models that are involved and get a feel for the flow of execution.

A quick example

All of the native total collectors have their own quirks, complexities, and “exceptions” to the rules, so finding a straight-forward example is a challenge. To simplify as much as possible, I’ll present the following pseudo example of how the two key methods on a total work. Most totals follow the same basic process in some fashion.

class MySite_MyModule_Model_Sales_Quote_Address_Total_Mytotal 
    extends Mage_Sales_Model_Quote_Address_Total_Abstract
{
    public function __construct()
    {
        $this->setCode('mytotal');
    }
    
    public function collect(Mage_Sales_Model_Quote_Address $address)
    {
        parent::collect($address);
        
        foreach ($this->_getAddressItems($address) as $item) {
            // These two lines represent whatever logic you're 
            // using to calculate these amounts
            $baseAmt = ...
            $amt = ...
        
            // Set the item's total
            $item->setBaseMytotalAmount($baseAmt);
            $item->setMytotalAmount($amt);
        
            // These methods automatically take care of summing 
            // "mytotal_amount" on the quote address
            $this->_addBaseAmount($baseAmt);
            $this->_addAmount($amt);
        }
        return $this;
    }
    
    public function fetch(Mage_Sales_Model_Quote_Address $address)
    {
        // Naturally, this exists on the quote address because "collect" ran already
        $amt = $address->getMytotalAmount();
        
        if ($amt!=0) {
            $address->addTotal(array(
                    'code' => $this->getCode(),
                    'title' => Mage::helper('mysite_mymodule')->__('My Total'),
                    'value' => $amt
            ));
        }
        return $this;
    }
}

In the next part, we’ll discuss some final points that are worth consideration before Magento totals can be considered well and truly conquered.

Next entries

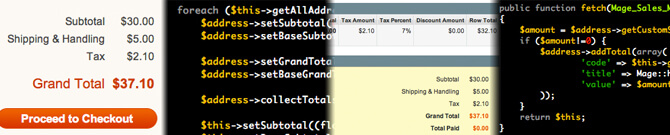
Unravelling Magento’s collectTotals: Introduction

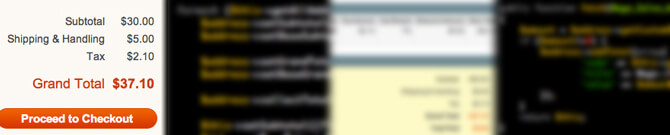
In this series, I’ll be explaining the process by which Magento handles calculating and displaying totals in the cart (i.e., subtotal, tax, discount, grand total, etc), and how to customize this process for your own purposes.

At its core, handling product prices and totals in an online shopping cart seems simple. Multiply the cart quantities by product prices. Add shipping. Add tax. And there you have it. The first time you have reason to modify the way cart totals are calculated and displayed in Magento, however, what you’ll find is anything but simple. In fact, your first impulse may be to run far, far away.

Why the complexity? Well, the first and most obvious reason is that even straightforward totals calculations aren’t as simple as they appear. Is shipping a percentage or a flat rate? Is shipping taxed, and where do we get the information on the tax rate that applies to the customer? What kind of discounts are we applying, and is there a limit on the number of items they can be applied to?

And Magento’s robust feature set throws a ton of other factors into the mix: Special prices, tier prices, shopping cart price rules, coupon codes, gift cards . . . Building a stable system that makes all of these factors play nice, and leaves room for customization, is no easy feat. Magento’s technique for totals collection allows calculations to remain nicely segmented into their own modules, and it’s designed to help you keep your sanity, not lose it, once you understand how the process works.

Diving into the code responsible for adding a product to the cart, you’ll discover something peculiar: At no time during the direct execution of Mage_Sales_Model_Quote::addProduct is a price set on the quote item that represents the product in the cart. That’s because, for all the reasons listed above, the final price on an item can’t be determined except in the context of other information about the cart. And so the calculation of each item’s price, and every other piece of price information about the cart, is all done at once, kicked off by one method that’s called before saving the quote at various points in the cart updating and checkout process: Mage_Sales_Model_Quote::collectTotals.

To understand what happens there, let’s back up to see how a “total” is defined. What I’ll call a “total” or “total collector” is a particular pricing calculation that must be done on the cart (subtotal, tax, discount, grand total), and it has a model dedicated to two main jobs:

  • Calculating and changing appropriate info on the quote, quote address and quote items
  • Dictating how the specific total should be displayed in the cart (or check out, etc), if at all

Totals are defined in configuration XML, so if you take a look at app/code/core/Mage/Sales/etc/config.xml, you’ll find the following:

<global>
. . .
    <sales>
        <quote>
            <totals>
                <nominal>
                    <class>sales/quote_address_total_nominal</class>
                    <before>subtotal</before>
                </nominal>
                <subtotal>
                    <class>sales/quote_address_total_subtotal</class>
                    <after>nominal</after>
                    <before>grand_total</before>
                </subtotal>
                . . .
            </totals>
        </quote>
    . . .
    </sales>
. . .
</global>

Here we see multiple basic totals defined, along with the models that drive them. You can see that “before” and “after” nodes also dictate in what order totals calculations should be run. Browse the config files of other core modules like Mage_SalesRule and Mage_Tax, and you’ll see other totals defined.

Gaining an understanding of the totals collection process is valuable for varying degrees of customization. The obvious application would be if you need to create a new total collector of your own, and it’s important to understand that this need not be used only for a distinct total you want to store and display. You may wish to implement a total collector simply to modify the results of other calculations in the collection process. Or your customizations may be less intrusive, simply observing the “sales_quote_collect_totals_before” event to modify data before the process runs, in which case it’s key to know how that data will be acted upon.

In the next entry, we’ll take a more in-depth look into the config, models, and logic involved with totals collection.

Next entries

Classy Llama and PayPal: working together to build PayPal Credit Card Tokenization extension

Working closely together since 2008, Magento and PayPal have an impressive record of shared success due to their partnership. Both are unquestionably part of the Web’s e-commerce fabric and account for over 150,000 web properties (Magento) and 100+ million active online buyers (PayPal). As members of eBay Inc’s family of brands, the outlook for both companies is bright. This March, Classy Llama was presented with an opportunity to both serve a client with excellence through a custom extension and enhance the larger Magento community by making that extension publicly available through our partnership with PayPal.

Growing Together

The PayPal Partner Program was launched in 2007 to communicate the company’s commitment to the e-commerce industry by providing a trusted, flexible, and fully integrated payment solution. Due to eBay’s acquisition of Magento in June 2011, it seemed natural to expect the two companies’ partnership to expand moving forward. As part of this new relationship, PayPal has reached out to Magento Gold Partners through the PayPal Partner Program for assistance to strengthen the existing integration of PayPal and Magento. As a member of the program, Classy Llama has a unique interest in creating efficient and convenient payment solutions that satisfy our clients’ needs and the expectations of their customers. We firmly believe that PayPal products are an integral part of producing a pain-free purchase experience. Whenever a client presents a unique payment situation for us to solve, PayPal is frequently a part of the conversation.

Putting Down Roots

Just such a situation presented itself early this year when Classy Llama engaged in a full Magento site build relationship with UniformsAndScrubs.com (UAS), an online retailer of high-quality medical apparel, footwear, and accessories. Since both phone orders and repeat customers represent a large portion of their sales, UAS required two specific features related to payments.

  1. The site must feature the ability for customer service representatives and online customers to charge a saved credit card when performing returns, exchanges, new orders, and reorders. Since a traditional saved credit card solution requires additional security measures to meet PCI Data Security Standards, including such an option is often difficult and costly.
  2. Administrators must be able to re-charge PayPal billing agreements from the admin, just like they will be able to recharge credit cards.

Faced with this issue, Michael McGrath (CEO, UniformsAndScrubs.com) and Rob Tull (Director of Solutions, Classy Llama) led the solution effort in cooperation with PayPal. PayPal reference transactions offer a great alternative for allowing the reuse of past payment methods without needing to store credit card data on the merchant web server. One of the primary tenets of the inquiry was Mike’s belief that PayPal and Magento should provide specific support for Reference IDs on credit card and PayPal transactions due to the two companies’ relationship through X.Commerce. Upon review, the PayPal team identified a larger need for the functionality and engaged Classy Llama to build an extension that serves both UAS and the larger Magento community.

Bearing Fruit

During the Payment Method step of the checkout process, customers will be presented with the option to save their credit card information for future use. The customer will also be able to manage their saved cards from the new “My Credit Cards” section of their customer account that is included with the module. Administrators will also have access to the PayPal credit card or billing agreement payment method used on an order for the purpose of charging additional amounts or creating a new order from the same payment details.

With development on the extension currently underway, PayPal and Classy Llama expect a Summer 2013 release date via Magento Connect. UniformsAndScrubs.com expects to launch their new site June 2013.

Quick Facts

  • Create new registered customer and guest orders using a previous order’s credit card or billing agreement in the Magento Admin
  • Reference ID support for saved credit card transactions
  • My Credit Cards page in customer account
  • Release Date: Summer 2013

Contact Us