If a shopper stood in line at a retail store, ready to make a purchase, and walked away once they reached the cashier—leaving the merchandise on the counter—you’d hope a store associate would ask, ‘did you forget something?!’ For eCommerce, it should be no different.
In a world filled with endless distractions and digital storefronts that remove human interaction from the shopping experience, it’s no surprise that nearly 70 percent of online carts get abandoned.
Abandoned cart emails help you reconnect with the shoppers who displayed interest in purchasing your products, while gently nudging them across the virtual checkout line. These emails are essential for every eCommerce marketer’s strategy.
After all, abandoned carts represent revenue lost. And that’s a lot of money to leave on the table. How much, do you ask?
For nearly 3,000 brands over the course of 3 months, those abandoned carts added up to more than $60 million dollars, according to Klaviyo’s Abandoned Cart Benchmark Report.
Researchers analyzed more than 3,100 abandoned cart emails that were sent to nine million contacts and the results were clear: sending timely, relevant emails is well worth the effort. An effort that (with the right tools) can be automated.
As you think about setting up a series of abandoned cart emails, keep in mind the many different reasons people abandoned their carts.
People abandon carts for lots of reasons, but the most common ones, according to Statista, include:
- Shipping costs too much (63 percent).
- Discount code doesn’t work (46 percent).
- Order takes forever to ship (36 percent).
- Have to re-enter credit card info (30 percent).
- Have to re-enter shipping info (25 percent).
Whatever the actual reason someone abandons a cart on your site, it’s most likely not because they’re no longer interested in your products.
With a little persistence, marketers can use abandoned cart emails to convert shoppers, capture revenue they’d otherwise lose, and build relationships with more customers.
To make the most of your abandoned cart emails – and increase conversions – consider testing out the tips and tricks outlined below.
Use Subject Lines That Convert
Writing subject lines that are simple, clear, and to the point (and maybe a little clever – depending on your brand and audience) can help gain customers’ interest.
Consider the following three strategies to help you create copy that converts.
1. Keep it simple.
Remember the goal of your abandoned cart email subject line. Its only job is to get people to open your email.
When you’re competing for your shoppers’ attention, your messages should not only be compelling, but also be simple, direct, and to the point.
Instead of a subject line like:
Your favorite jeans are almost gone! Get 10% off, plus check out these items we think you’ll love!
Try something like:
Get your new favorite jeans before they’re gone!
To entice people to open your emails, keep your subject lines to one specific message. Then, use the body of your email to get shoppers to click through to your site to ultimately make their purchase.
2. Pair personalization with your automation.
Shoppers today are demanding more from brands.
They have more choices than ever and they’re choosing to engage with brands that provide value and are authentic—brands they trust.
A little personalization goes a long way toward developing relationships that lead to long-term value for both you and your customers. And it pays to personalize your emails. In fact, companies that personalize their emails saw a 17 percent increase in revenue.
So how do you specifically personalize your abandoned cart email subject lines? Try these tactics on for size [no pun intended].
Reference the product category.
Get your new favorite pants before they’re gone!
Or, to be even more specific, reference the item product type.
Get your new favorite jeans before they’re gone!
Include the shopper’s first name.
[Lizzie], you forgot something!
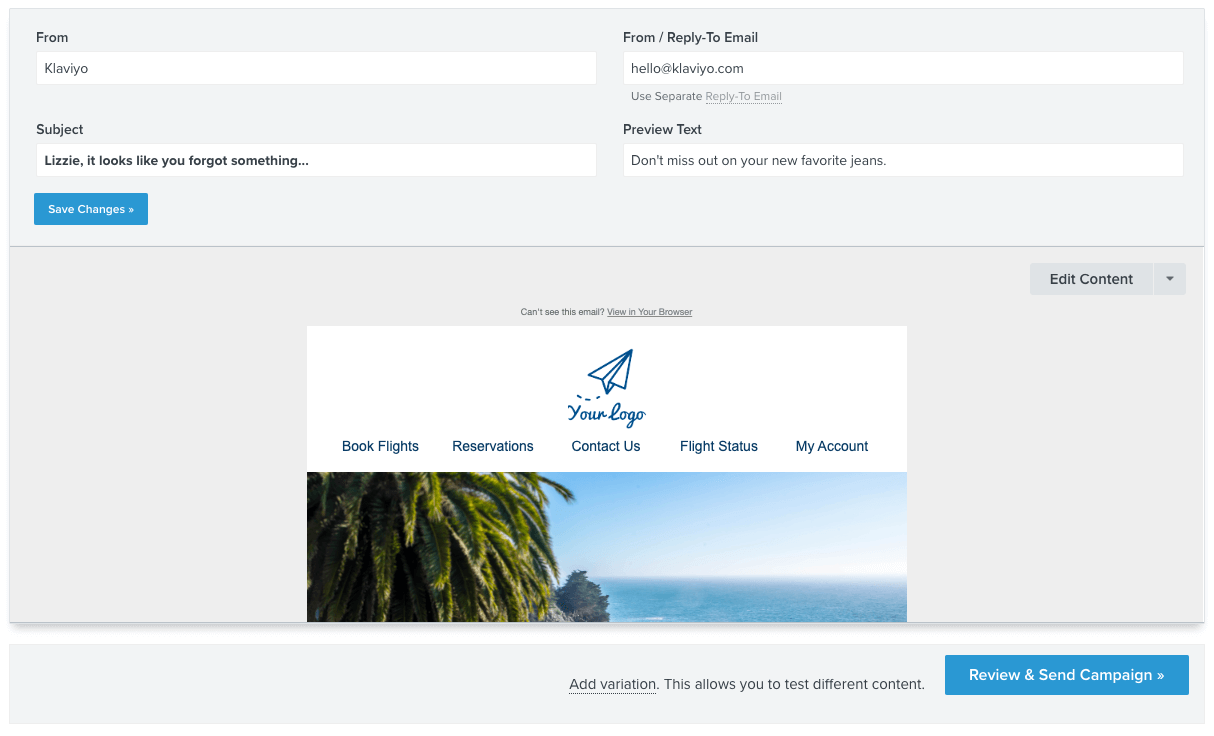 Including your shopper’s first name in your subject line allows you to speak directly to them and make them feel like their experience with your brand is unique.
3. Convert with curiosity.
You can create a sense of curiosity with your abandoned cart subject lines in many ways.
Phrase your subject line as a question.
Did you leave something behind?
This encourages people to remember their recent experience with your brand and think back to items they added to their carts.
End your subject line with a cliffhanger…
I think you left something behind…
This gets readers wondering what they might have forgotten and encourages readers to open your email to learn more.
Segment Your Abandoned Cart Emails
Abandoned cart emails are essential to growing your business. But what’s essential to sending effective abandoned cart emails? Getting the right message to the right customer at the right time.
Subject lines matter a lot, but so does segmentation.
Here are three ways to segment your list and send more relevant abandoned cart emails to your shoppers.
- Cart value (the value of the items in a cart).
- Repeat vs. first-time customers.
- VIP Customers
1. Cart value
If a shopper leaves items in their cart, be sure to look at the value of those items. It could indicate that the shopper is considering how much they want to spend – or they could be looking for better prices elsewhere.
Say your average customer’s order value is typically $100, but this particular customer has $300 worth of products in their cart.
Consider offering them something like free shipping, a gift with purchase, or a discount to compel them to act.
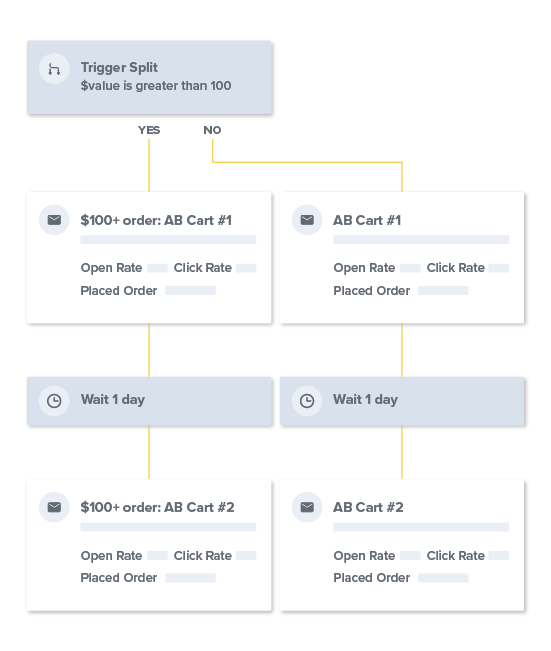 Pro tip: Klaviyo lets you easily split and branch emails within a series, so you can send each customer down the right path.
2. Repeat vs. first-time customers
Every brand wants repeat customers. They’ve already expressed an interest in your products, and they’re likely to purchase again so it’s not necessary to offer them a discount right away. You also don’t want to train your customers to expect a discount every time they abandon their cart.
Instead, consider offering something else to incentivize them like free shipping, bonus rewards points, or a free gift with purchase.
For first-time customers, offering a discount is a great way to incentivize them to make a purchase.
3. VIP customers
How you define who your VIP customers are is up to you, but in general, they’re the people who either buy frequently from you or spend a significant amount of money with your brand. These customers have a stronger loyalty or larger potential than your run-of-the-mill repeat shopper.
Say you have a VIP customer who hasn’t browsed your site or made a purchase in the last few months, but today they visit your site and abandon a cart with a high-value item in it.
You’ll likely want to treat them differently than you would any other customer who’s making a regular purchase, so you can use your abandoned cart emails to offer your VIPs a special discount or exclusive access to something that’ll be relevant to them.
A/B Test to Know What Works
Abandoned cart emails are proven to help you make more money. But not every abandoned cart email will live up to its potential on its first try. That’s where A/B tests come in.
Not familiar with A/B tests? They’re a simple yet effective way to get some data on what works for your brand. You basically create two versions of an email and test them against each other to see what works best (version A or version B). The goal: design experiments to help you figure out which messages resonate best with your audience.
When designing your A/B test, the most important thing to do is test one thing at a time (i.e., if you test your subject lines, only test your subject lines and nothing else within the email itself).
Below are three components to A/B test when it comes to your abandoned cart emails:
- Test your subject lines.
- Test how many emails you send.
- Test when you send your emails.
1. Test your subject lines.
A common question marketers ask is, “What will get people to open my emails?”
Figuring out which messages will work best is a critical part of making sure your abandoned cart emails work as well as they can for your business.
Try different variations of your subject lines. For example, see if a gentle reminder sparks more open rates or if a compelling offer does the trick.
Variation A: [Lizzie], it looks like you left something behind.
Variation B: The [product] in your cart is almost sold out!
If you find the gentle reminder works best, try different variations of your gentle reminder next.
Variation A: [Lizzie], it looks like you left something behind.
Variation B: Forget something, [Lizzie]?
Does the straightforward statement perform better or does the question format win?
If you find the statement works best, try testing how you style your copy next.
Variation A: [Lizzie], it looks like you left something behind.
Variation B: [Lizzie], it looks like you left something behind!
 This subject line is almost exactly the same, but it’s been styled slightly differently. Notice the period at the end of the first variation and the exclamation point at the end of the second variation. There are lots of ways to style your subject lines—use bold text, brackets, emojis, symbols, etc.
The best way to know what will work best for your audience is to keep designing experiments to test your subject lines and refine your messages based on the data you collect.
2. Test how many emails you send.
Another common question eCommerce marketers often grapple with is, “How many abandoned cart emails should I send?”
It’s a tricky question. You want to make the most money possible, but you also don’t want to annoy your customers.
The answer to that question will vary based on your business, but the data shows that sending just one email will leave money on the table while sending more than five emails is considered overkill (and it could damage your sender reputation, too).
In terms of benchmarks, these are the average abandoned cart open rates:
- First email: 62.94 percent.
- Second email: 48.65 percent.
- Third email: 46.11 percent.
- Fourth email: 46.59 percent.
- Fifth email: 39.09 percent.
- Sixth email: 34.83 percent.
- Seventh email: 31.91 percent.
The sweet spot is to send somewhere between two to four emails, though be aware that the open rates of each subsequent message will likely drop as time goes on.
Create a series of emails and test their open rates to see where the point of diminishing returns occurs for your brand, then refine your series based on the data you collect.
3. Test when you send your emails.
Another question marketers often ask is, “At what point after someone abandons a cart should I send an email?”
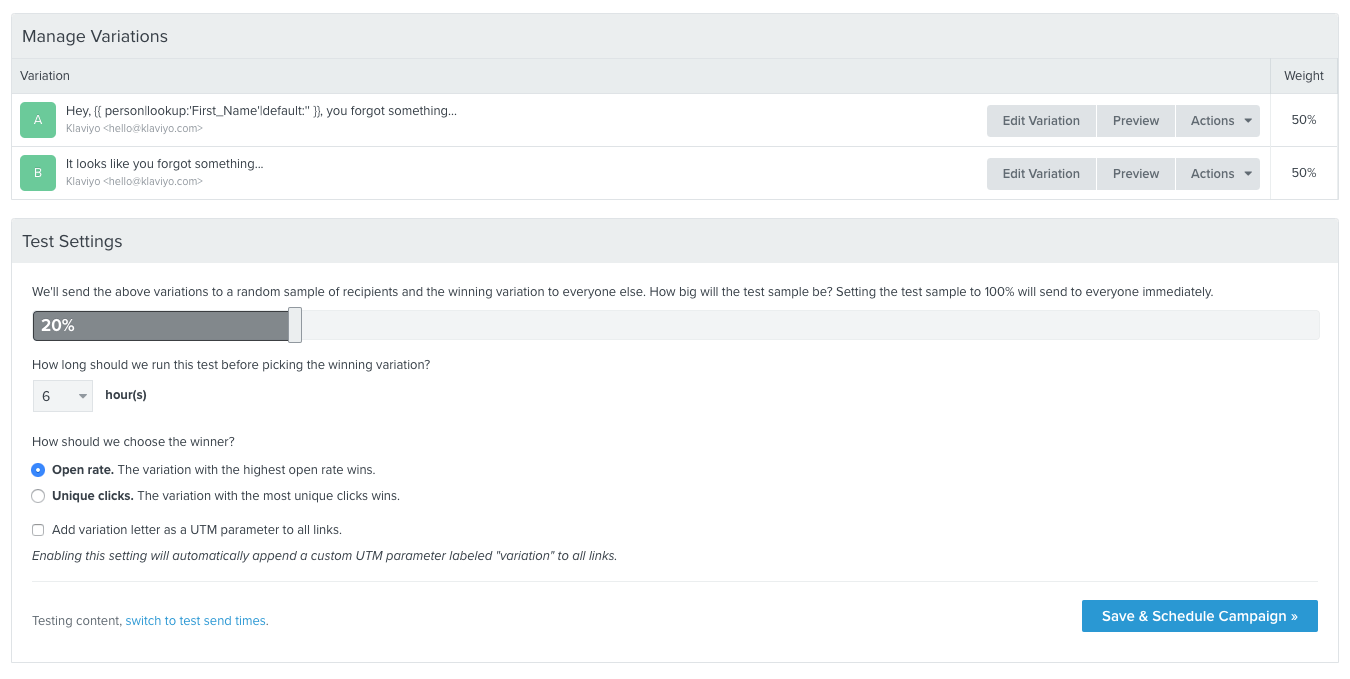
In its research, Klaviyo also looked at when the top 100 performers in the study sent their emails. They found 91 of these companies sent the first abandoned cart email less than five hours after someone left their site.
These first emails were the most effective in the series, which makes sense—the sooner you reach someone when they’re considering your products, the better.
That said, there’s no single best time to send an email. It really depends on your business and what you sell.
Unless you sell big-ticket items, where it might make sense to have a longer delay between your messages, try sending your first message anytime between one and four hours after someone’s started a checkout. Then, send a second message a day or two later if they haven’t responded to your first message.
There’s no shortage of things you can test when it comes to your abandoned cart emails. Start by keeping things simple and experiment as you collect data and grow.
Taking Action
There’s plenty of data that shows abandoned cart emails help brands recover potential lost sales and make more money, so it’s clear why every eCommerce marketer should include a series of abandoned cart emails as part of their email marketing mix.
To get people to open your abandoned cart emails, there are many different strategies to try:
- Play around with all sorts of of subject lines.
- Experiment with how you write and style your copy.
- Segment your list so shoppers receive the most relevant messages.
- Test each experiment and let data tell you what works best.
But the bottom line is that every eCommerce business is different.
What works for one brand might not work for another. And what works for your brand today might not work for your brand as you grow.
Take these tips and tricks as inspiration, and test some new techniques that you think will resonate well with your customers. Then test again and again.
About Klaviyo
Klaviyo is the growth marketing platform built for online businesses of all sizes.
Consuming more customer data than any other solution on the market, Klaviyo helps brands own the customer experience. The platform analyzes every interaction and captures 360-degree views of your customers. Delivering richer insights, Klaviyo empowers you to create more personalized marketing moments and higher value customer relationships.
When you own your marketing experiences, your growth possibilities are endless. That’s why more than 22,000 of the most innovative brands rely on Klaviyo to own their marketing.
To sign-up for a free account, or request a demo, visit www.klaviyo.com.


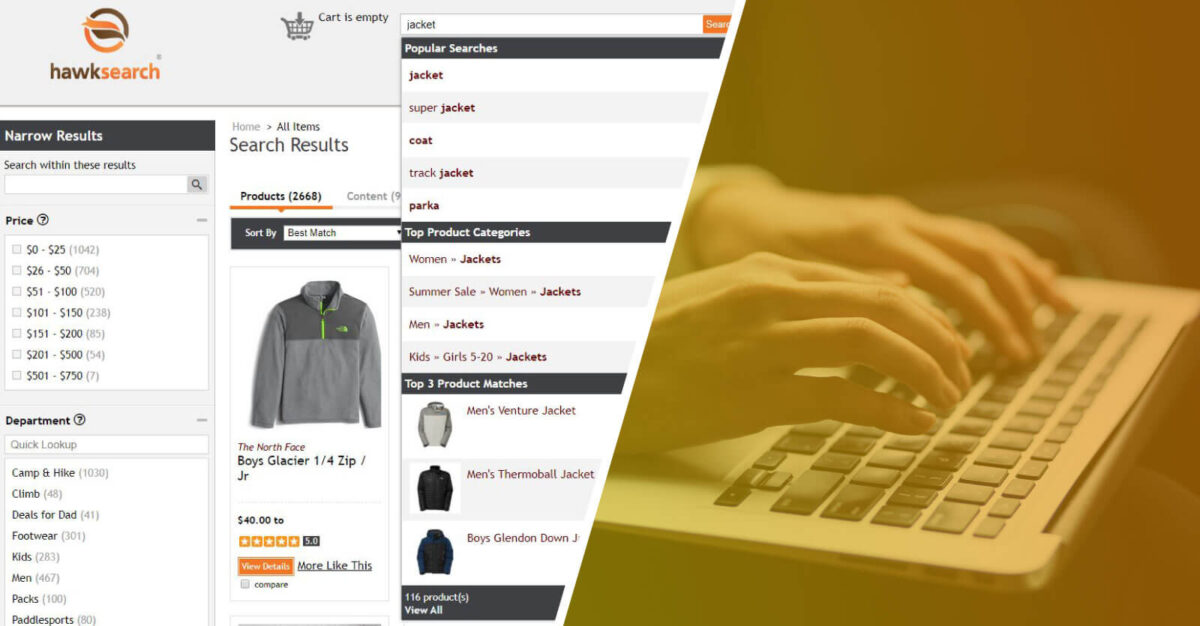
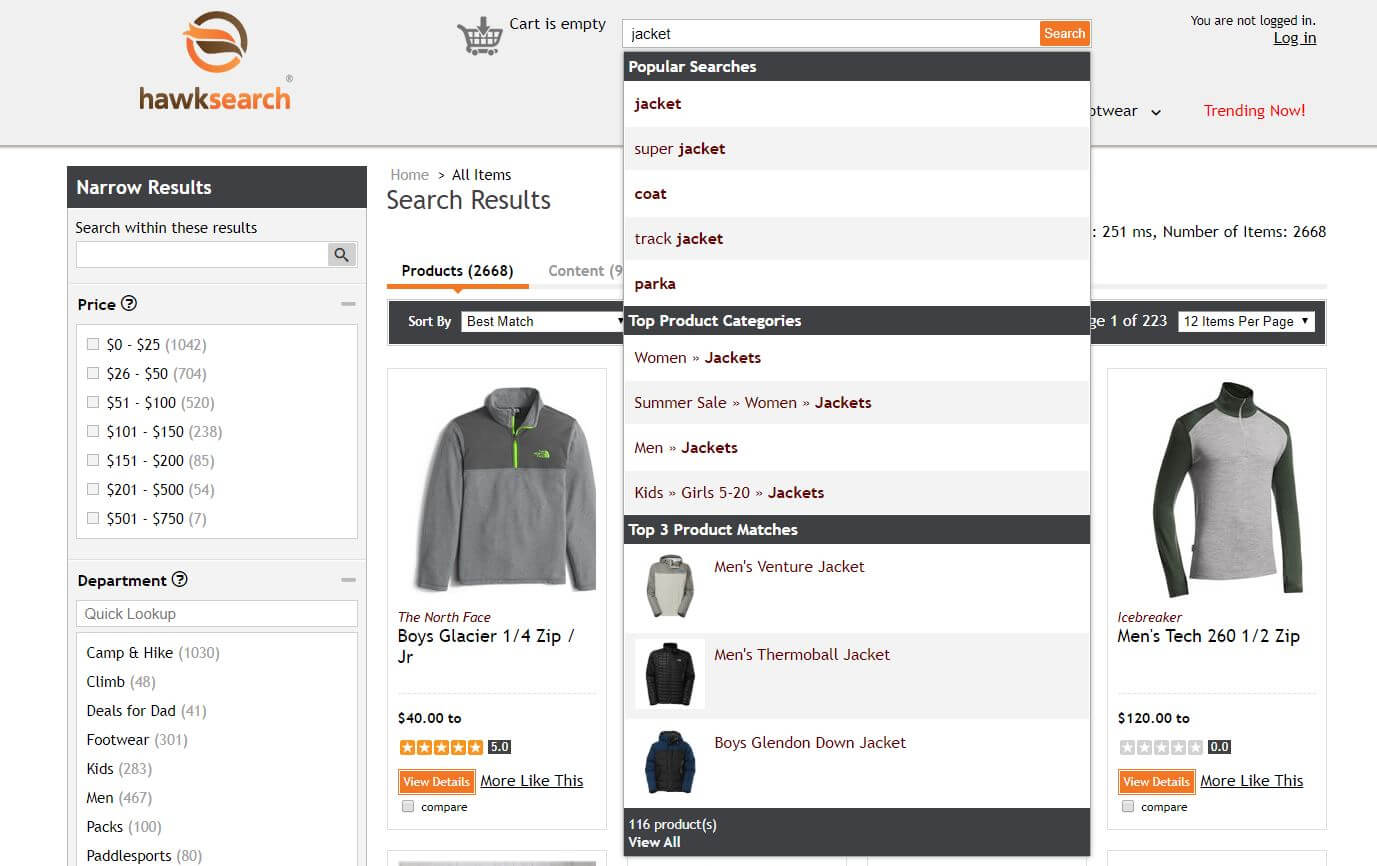
 Classy Llama helped to re-architect this feature on the backend and design a new UX that would help customers find what they were looking for more quickly.
 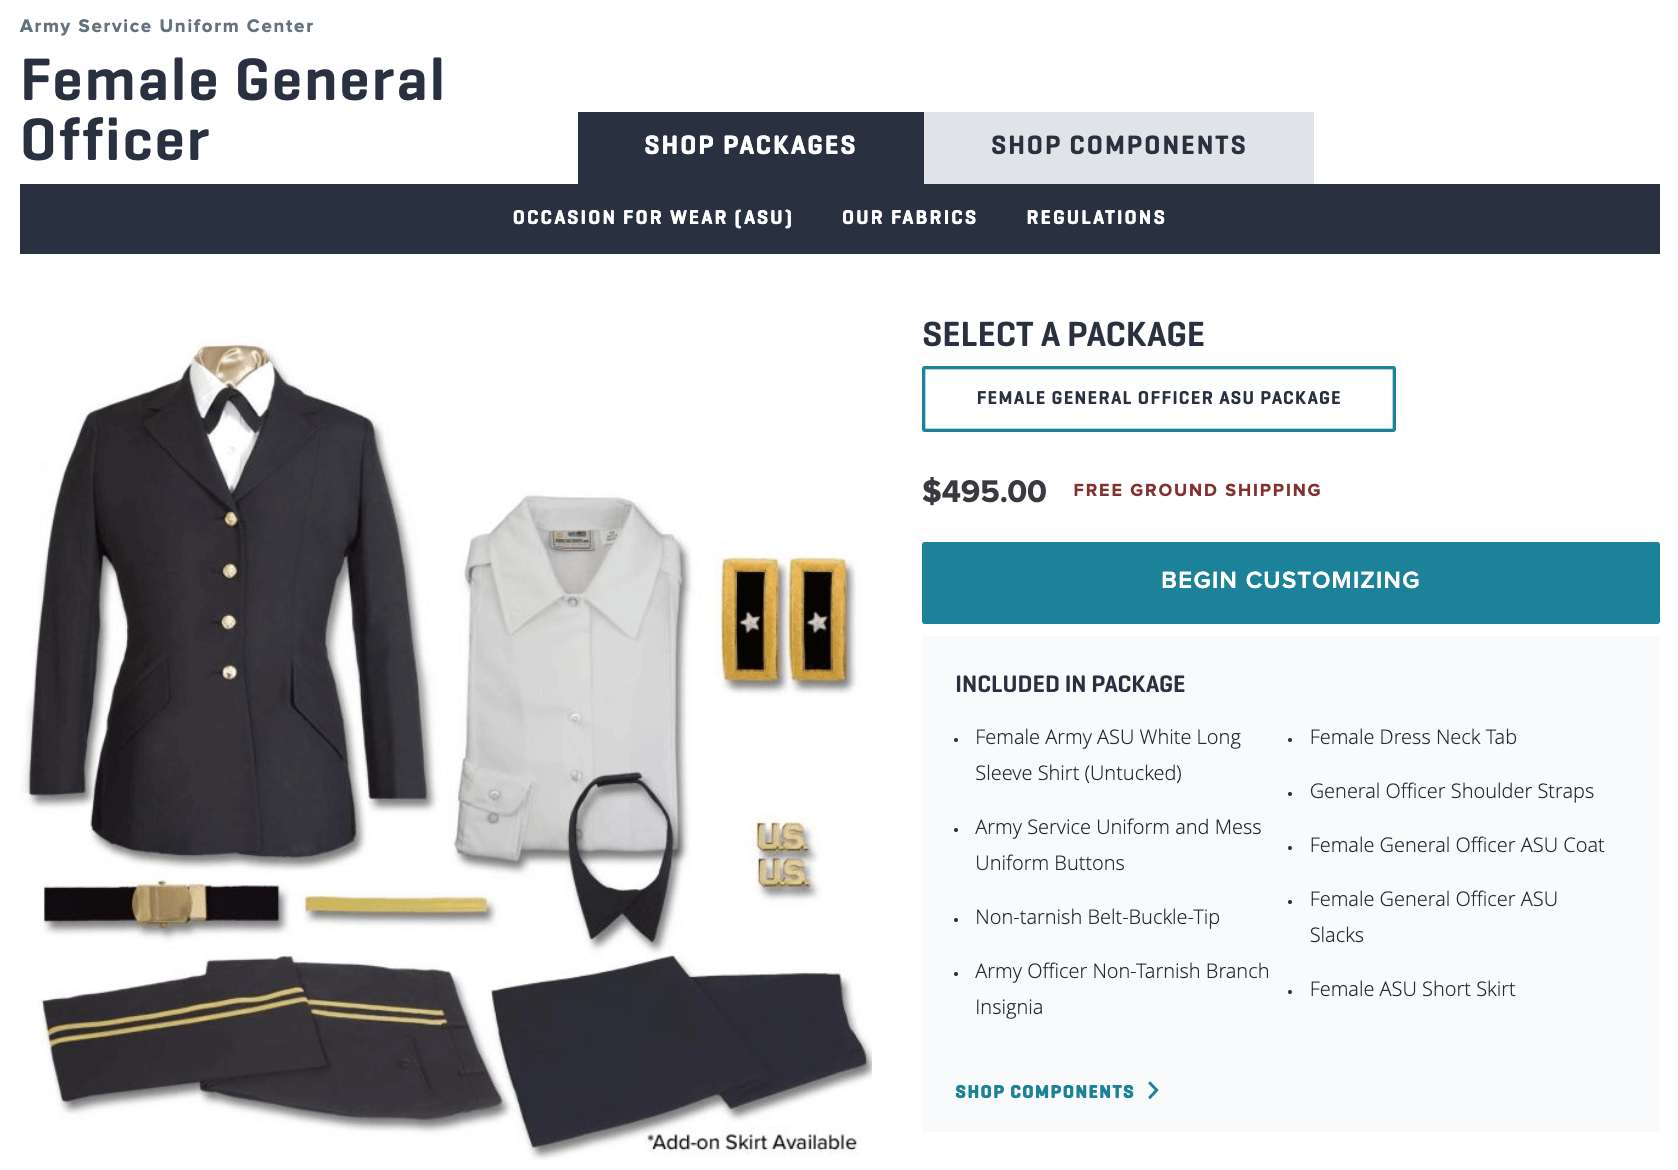 On the frontend, a new user interface streamlined the way customers selected complete packages or individual components. Our design team crafted a tabbed interface that allows customers to view either Packages or Components without loading separate pages. Previously, customers looking for individual components had to scroll down the listing to find components below the package.
 Outcomes
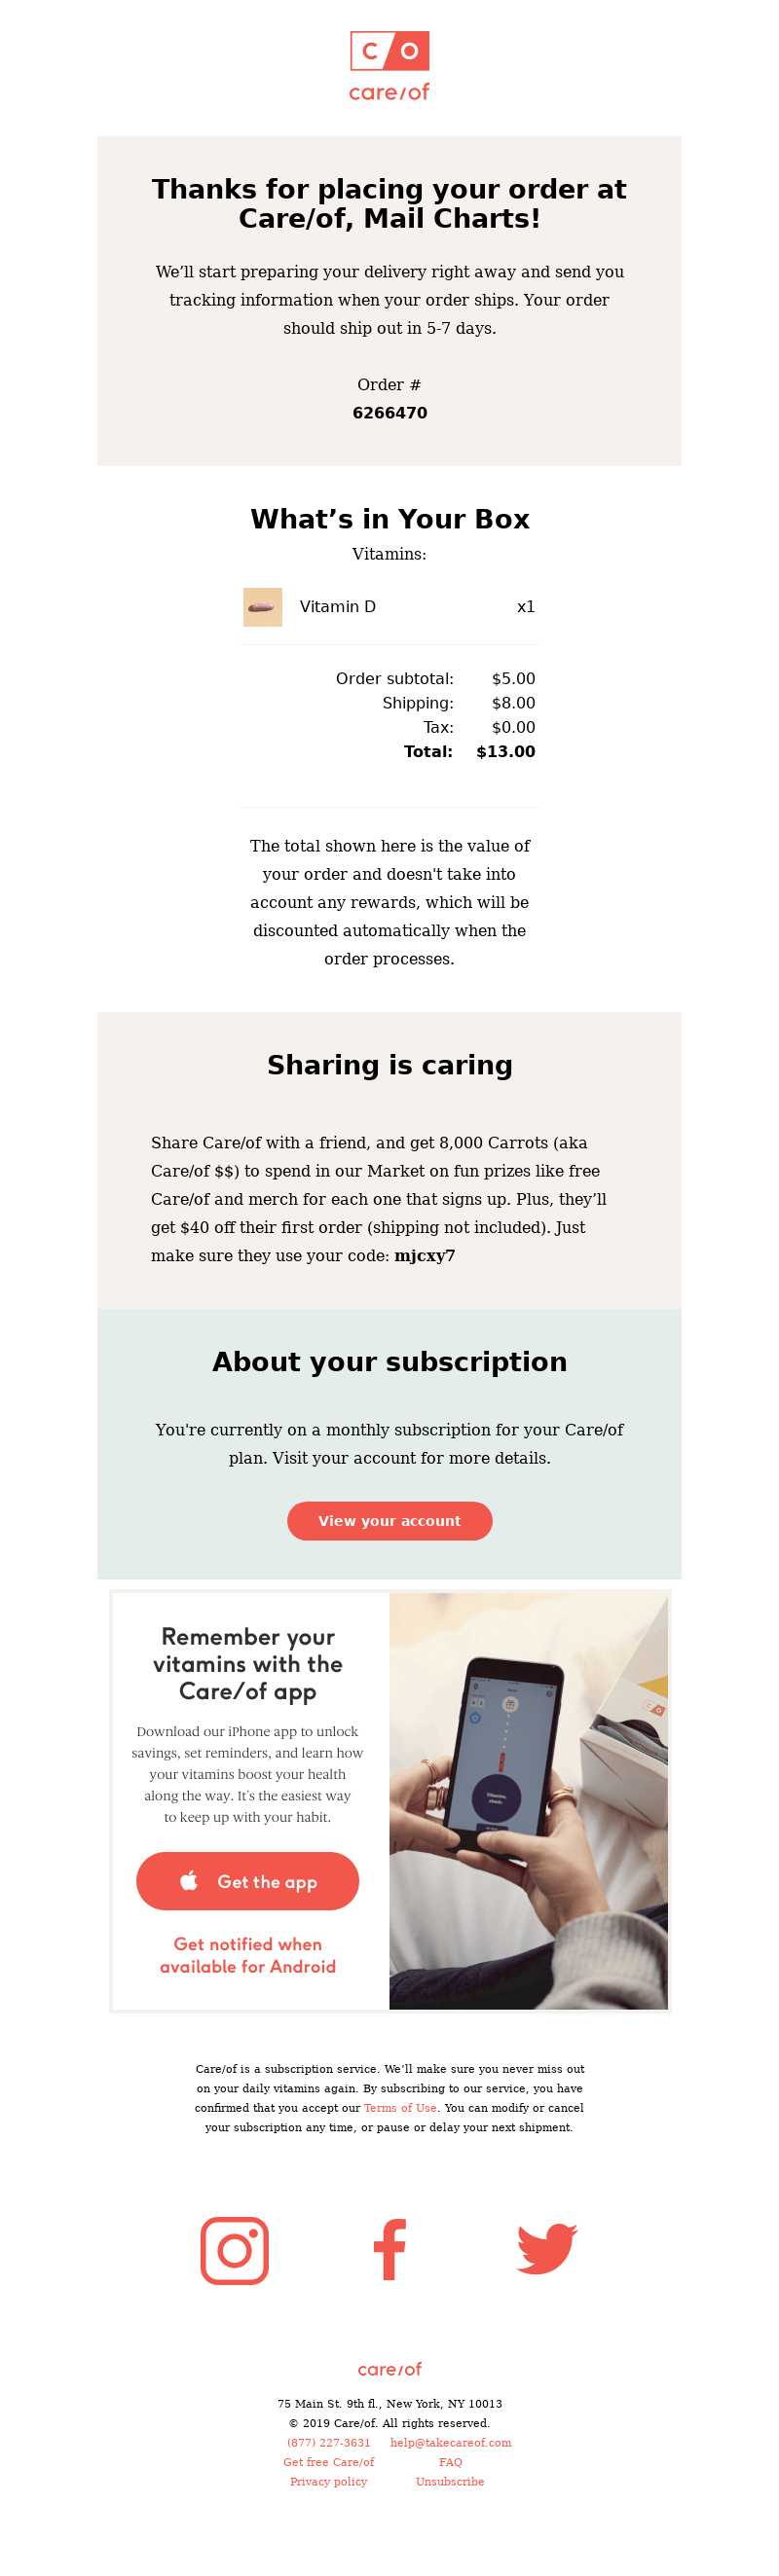 It relays the order information immediately, but it is also chock-full of other offers. In this email, readers are:
 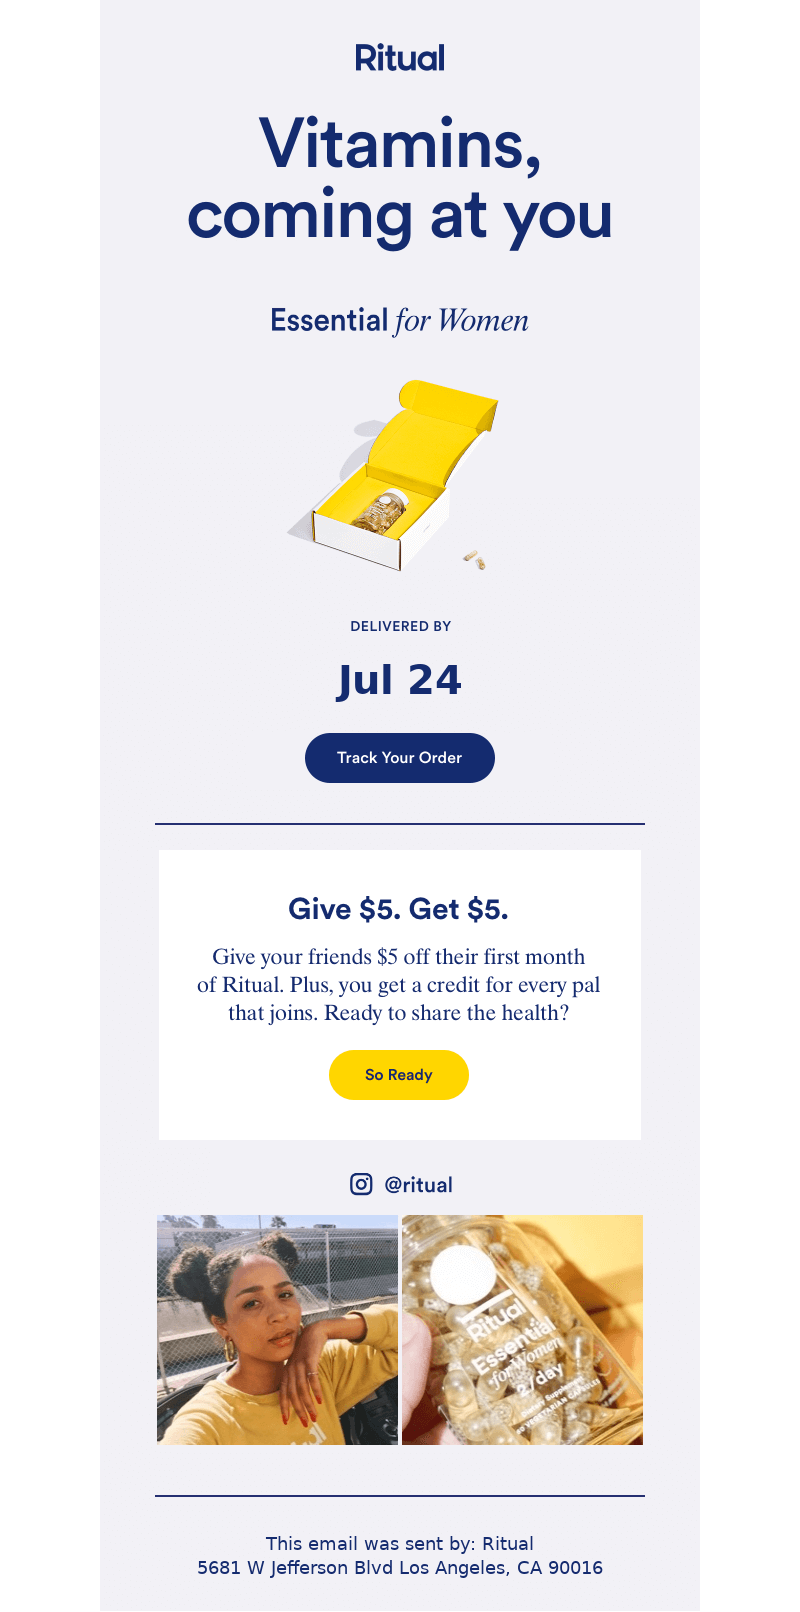 Ritual uses the space below the shipment reminder to cross promote a referral bonus and remind shoppers of their Instagram account. It’s a triple play.
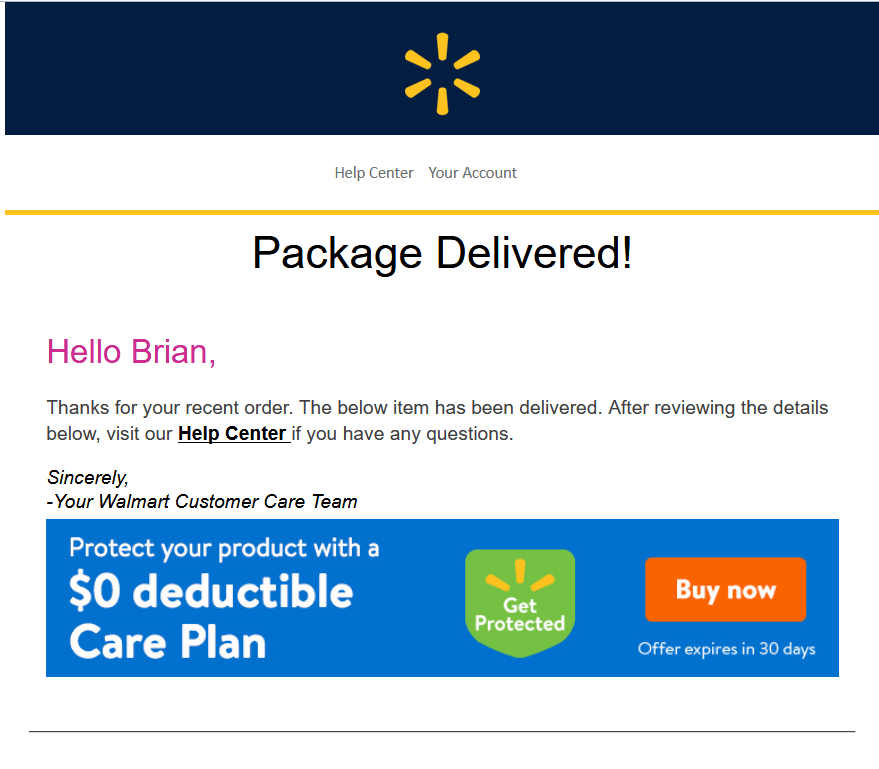 And Walmart takes this final opportunity to upsell an extended warranty.
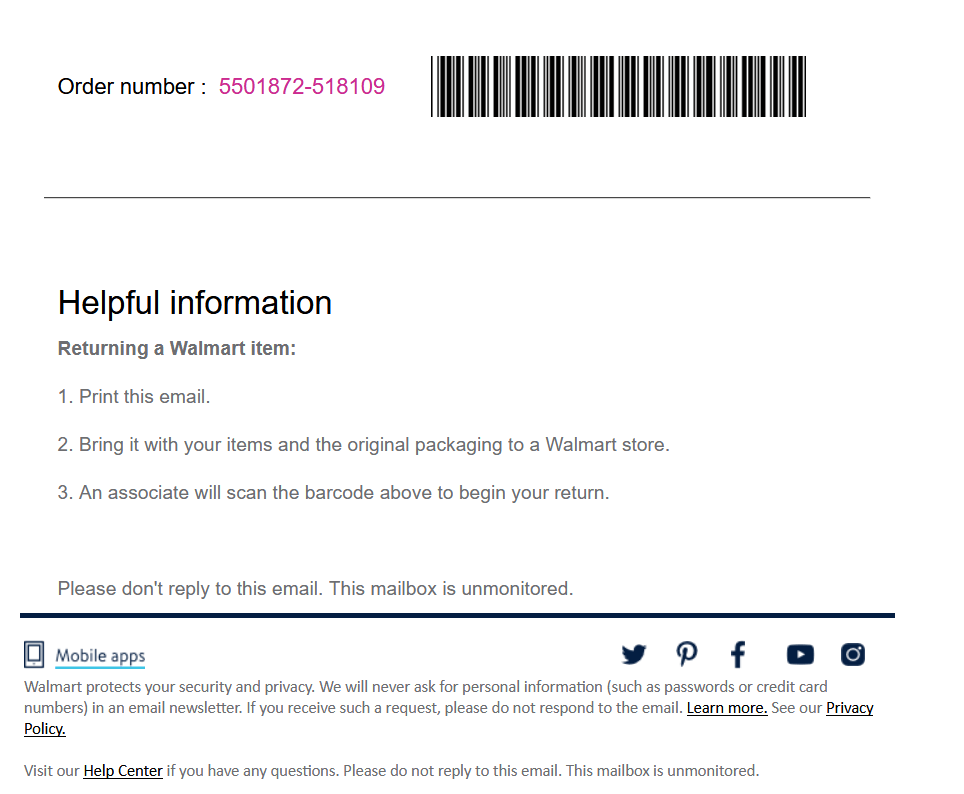 It also provides links to social media, mobile apps, and the help center. Like all the marketing emails above, you’ll notice this one came from an unmonitored mailbox. That’s because it is a transactional email.


 SEO Booster
 Machine Learning
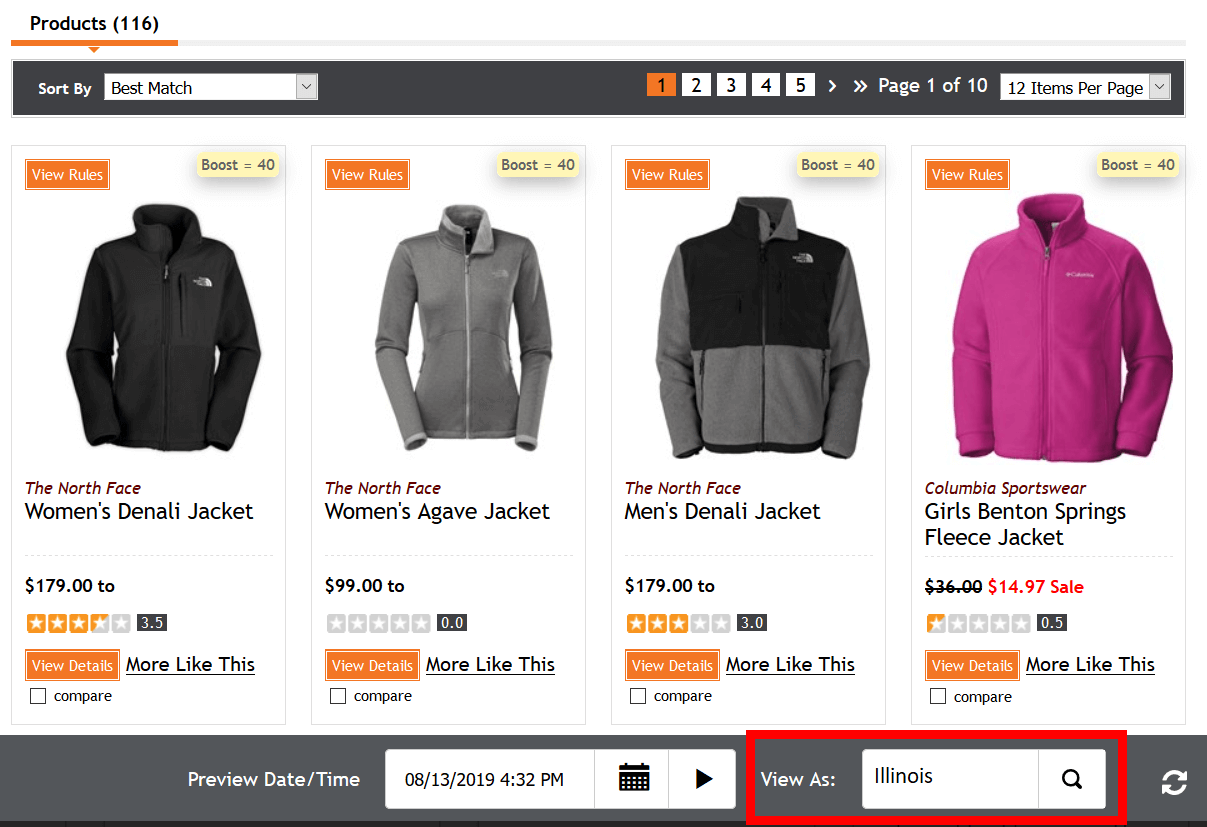
 Visitor Targeting
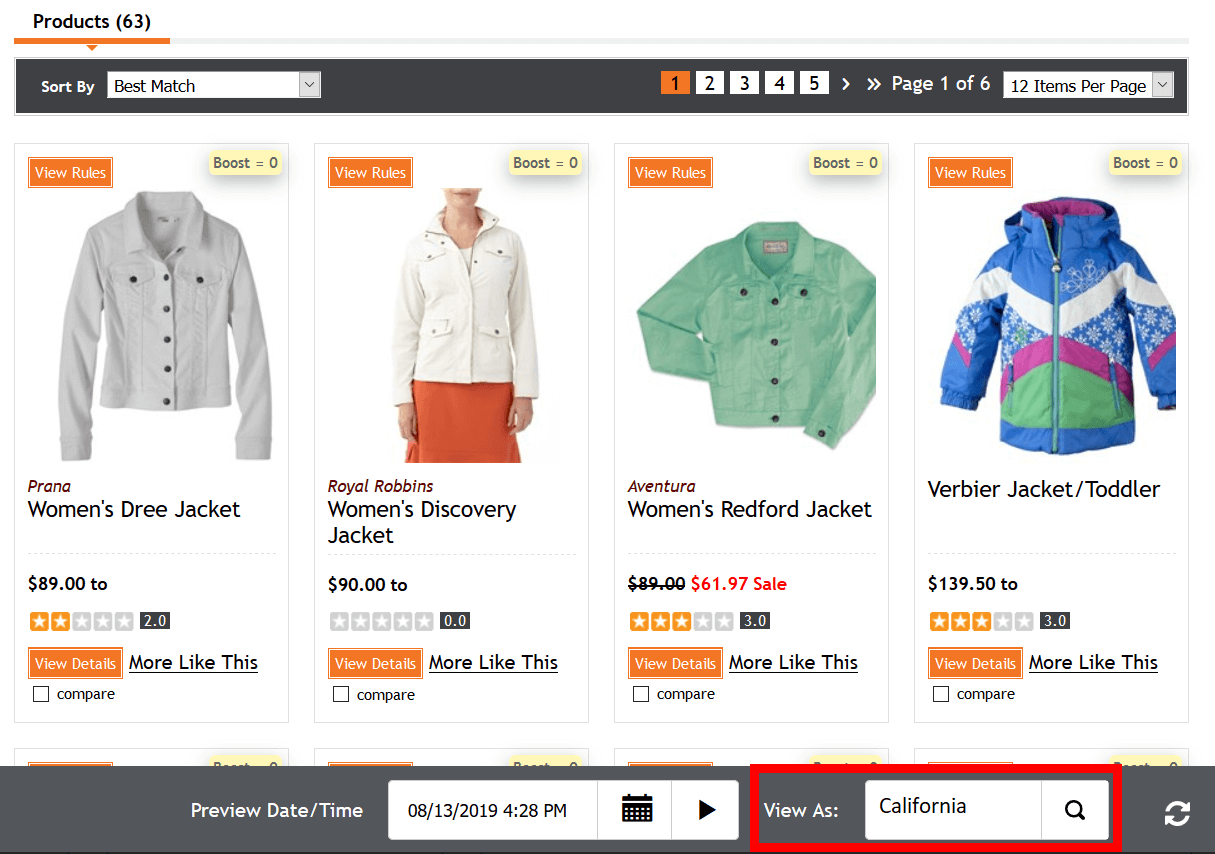
 Search Result Metrics
 Conclusion