Google Analytics and Magento 2

Google Analytics is an important tool for merchants in the eCommerce and Magento communities because it allows merchants to make informed decisions about their website based on their users’ interactions. With the advent of Magento 2, it’s important to understand how the new version utilizes and integrates with Google Analytics. If you’re familiar with Magento 1, you’ll remember that Google Analytics was fairly easy to setup so you could quickly view reporting data. What about Magento 2? Don’t worry, integration with Google Analytics offers additional features with the same setup ease.

What’s the Same?

  • Universal Analytics – Magento 2 still features the same quick-and-easy Google Analytics setup. It’s just a matter of enabling the Google Analytics setting and adding your account number. Thankfully, the deprecated option of ‘Google Analytics’ (as opposed to ‘Universal Analytics’) is no longer around to add confusion during setup.

alt text

  • Adwords – this hasn’t changed in Magento 2; it’s still just as easy as adding your Conversion ID and Label.
  • E-commerce Tracking – One very powerful feature that seems to fly under the radar is eCommerce tracking. This feature is a must-have for any eCommerce site and lets you track transaction and product data on your site. If you already use Google Analytics with Magento, you get this feature with almost no setup. The only thing required to start using eCommerce tracking is to enable this feature in your Google Analytics account. Magento does the rest.

alt text

  • Google Tag Manager – Magento 2 Enterprise Edition includes the option to use Google Analytics via the flexible option of Google Tag Manager.

What’s New?

Magento 2 supports a Google Analytics feature called Content Experiments. This feature allows you to setup A/B tests on your Magento site to track how different versions of pages perform. Although its simplicity makes it a good solution for small-scale A/B tests, I don’t think it’s a good solution for complicated A/B testing.

To set up content experiments, (and after toggling the feature on in Magento admin configuration settings), there are only two steps:

1. A new experiment needs to be setup in your Google Analytics account. This is pretty straightforward. (Make sure to select the option to manually insert code and save this for the next step). You can follow the instructions from Google here.

alt text

2. Connect the new experiment with Magento. Create at least two new CMS pages, (this can be done with any number of different variants), your ‘original’ version and a ‘variant’. Place the javascript snippet from the experiment setup in the previous step under the new tab, ‘Page Experiments’. Just like other Google Analytics features, Magento handles rendering the snippet in the correct place on the front end.

alt text

That’s it! The way this simple example experiment has been set up, half of the visitors will be sent to the original page and half to the variant. You can track how your experiments are trending in the reporting section of your Google Analytics account under Behavior > Experiments.

To learn more about how Classy Llama approaches A/B testing check out this post.

What else?

A lot of our clients are interested in eCommerce tracking. And while the eCommerce tracking provided by Google Analytics provides a lot of good data, it can sometimes be hard to visualize or grasp what you’re looking at. This is where goals and funnels come in.

  • Setup your goal(s). This can be done many different ways depending on what you are wanting to track and how your user interacts with the site. Google provides documentation on setting this up different ways. A basic example of a goal is a user completing an order (reaching the success page).

alt text

  • One thing to keep in mind: By default, Google tracks views on secure urls separately from unsecured urls. So if you use a destination goal which includes both secure and unsecured pages, you will need to setup cross domain tracking.
  • The funnel visualization view (Under Conversions > Goals) can provide great insight into how users are moving through your website and reveal pages that have unusual rates of drop-off.

alt text

Another common thing to track is cross-selling/upsells. A merchant may want to know how often an advertised cross-sell product is clicked. To accomplish this, an event (or trigger if using Google Tag Manager) needs to be setup to let Google know when a cross-sell product is clicked. You can do this in Google Tag Manager, or by adding some javascript: javascript ga('send', 'event', 'cross-sell', 'click', '{product-id}'); Then in the Google Analytics dashboard, setup an event goal:

alt text

Both of these goal examples can easily be modified to include different steps in the flow or more complicated events. You can view reporting details about any of the goals you’ve set up under Conversions > Goals > Overview.

These are fairly simple examples, that just skim the top of what this feature can provide.

Summary

By expanding the features in the integration of Google Analytics, Magento 2 empowers merchants to make informed decisions about their site. And the setup ease of content experiments, eCommerce tracking, and the other Google Analytics features allow merchants to focus their efforts on improving the performance of their website.

A Deep Dive into Magento 2

Magento 2.0 and now even 2.1 are released and available for merchants. Rob Tull joins Brett Curry on the Llama Commerce Show to take a deeper dive into M2. In this podcast, we’ll discuss what’s new, who should consider upgrading, who should wait, and what’s on the horizon for M2. Get the inside scoop on new improvements and things to consider before switching.

More podcasts and content available at www.llamacommerceshow.com.

Classy Llama Made Premier Google Partner Status

Google revamped its Partner Program earlier this month, promoting a very select group of their North American partners to the prestigious “Premier” level – and Classy Llama qualified! We are officially a Premier Google Partner.

About Google Partners  

The Google Partners program was created in 2011, to connect businesses with advertising agencies and marketing professionals that were capable of helping merchants grow through AdWords advertising. In order to receive a partner badge, agencies must demonstrate their AdWords skill and expertise, meet a certain AdWords spend requirement, deliver agency and client revenue growth, and exhibit a sustained and growing client base.

To show your skill, each agency must have at least one employee that is certified in AdWords fundamentals, as well as one of Google’s five specialty advertising fields: Advanced Search, Display, Mobile, Video, and Shopping.

Premier Partnership Meaning

Beyond the initial certification to become an official “Google Partner,” a new recognition was created, reserved for Google’s most valuable partners. To advance into a Premier Partner, agencies are held to higher spend thresholds, higher performance standards, and more certification requirements.

Classy Llama earned this badge by meeting Google’s highest performance standards, having multiple team members certified, and for managing numerous large AdWords accounts. As Google Partners, we are fluent in all things AdWords. Being a Google Partner means that we deliver quality customer service, offer a competitive advantage to clients, and have received training to help grow businesses online.

Why it Matters

Our premier partnership provides you with a wealth of knowledge at your fingertips. This partnership guarantees that you will be working with certified analysts and account managers, who have mastered the art of AdWords. Our team fully understands the use of site links inside of ads, negative keywords, ad extensions, phrase-match keywords, A/B testing, and more.

Google Partners with a large ad spend also have their own Google Agency team, allowing your business to receive immediate support directly from the experts. Our partnership includes access to competitive insights and industry trends, not available to the public or lower level agencies. Partners also receive access to AdWords Beta programs, ensuring that we remain current in best practices and new features.

When you work with Classy Llama, you’re working with one of Google’s most valued agencies. Our commitment is to consistently add value for clients. Google recognizes us as a top performer only when your business succeeds.

Using Javascript to Get the Magento Configurable Product Child ID

It’s not every day that you need to know what a configurable product’s resultant child product ID is on the front end. But, if that’s you and you’re looking for a simple solution that doesn’t override core Magento javascript, you came to the right place.

Fortunately for us, the javascript object spConfig has everything we need to determine the child product ID based on what options have been selected on the product detail page. Below you’ll find the code. Let’s walk through it.

function getSimpleProductId() {
    var productCandidates = [];
    jQuery.each(spConfig.settings, function (selectIndex, select) {
        var attributeId = select.id.replace('attribute', '');
        var selectedValue = select.options[select.selectedIndex].value;

        jQuery.each(spConfig.config.attributes[attributeId].options, function(optionIndex, option) {
            if (option.id == selectedValue) {
                var optionProducts = option.products;

                if (productCandidates.length == 0) {
                    productCandidates = optionProducts;
                } else {
                    var productIntersection = [];
                    jQuery.each(optionProducts, function (productIndex, productId) {
                        if (productCandidates.indexOf(productId) > -1) {
                            productIntersection.push(productId);
                        }
                    });
                    productCandidates = productIntersection;
                }
            }
        });
    });
    return (productCandidates.length == 1) ? productCandidates[0] : null;
}

The spConfig.settings property contains an array of the configurable option select boxes. We’ll loop through these to determine the attributeId and selectedValue for each select box.

Now that we know the attributeId and selectedValue of the selected option, we can use the spConfig.config.attributes property to obtain an array of child product ID candidates and store them to the optionProducts variable.

On the first iteration of the loop, the productCandidates array is empty and can be set to optionProducts. If this were the only select box on the page, productCandidates should now contain only one value: the child product ID we’re looking for. If there are numerous select boxes on the page, each loop will set productCandidates to the array intersection of productCandidates and optionProducts.

After looping through all of the select boxes there should only be one value in the productCandidates array. However, we want to avoid assumptions if at all possible, so the final line ensures that we only return a product ID if it’s the only product ID in the array.

Lastly, we need a way to trigger the function. This can be done quite easily by adding a change event listener to the configurable option select boxes. Each time the user selects an option or changes their selections, the getSimpleProductId function will return the resultant child product ID if all options have been selected and false otherwise.

jQuery(document).ready(function() {
    jQuery(".product-options select[id^='attribute']").on('change', function() {
        // Your code here
        // alert(getSimpleProductId());
    });
});

How UX Impacts Customer Experience and Purchases

User experience (UX) encompasses all aspects of the end user’s interaction with your company, including your services and products. It plays a critical role in influencing your overall customer experience and buying behavior.

Think of it as if you’re walking through a store. You’ve got a few items on your list and you want to get in and out fast. The store aisles are each labeled with numbers and a large sign that helps you quickly identify where you need to go. You’re able to get there quickly because the aisles are tidy and easy to navigate through. Employees throughout the store to ask if you need help finding anything and they greet you with a friendly hello and warm smile when you approach. You’re able to get everything you need on your list and even find a few additional items on sale. You go to the checkout and are again warmly greeted. You get all your items rung up, bagged, and paid for with ease. This is a good UX.

Similar to this traditional brick and mortar UX, when visiting your site your customers are having an experience. The experience they have should have is one that is easy to navigate, allows them to find what they are looking for, and quickly checkout.

Analyzing Your UX

How do you know if your website is providing your customers a good UX? A great visual design is just one piece of the puzzle to a great UX. There are many parts to UX and a good jumping point to start analyzing your UX is the User Experience Honeycomb made by Peter Morville.

The honeycomb will help you analyze your site and find areas that you need to focus on improving and testing.

Here’s what it all means:

  • Useful. Is your product or website useful in any way? The more useful, the better the experience.
  • Usable. Ease of use. If it’s too complicated or confusing to use, you’ve already lost. Usability is necessary (but not sufficient by itself).
  • Desirable. Our quest for efficiency must be tempered by an appreciation for the power and value of image, identity, brand, and other elements of emotional design.
  • Findable. We must strive to design navigable web sites and locatable objects, so users can find what they need.
  • Accessible. Just as our buildings have elevators and ramps, our web sites should be accessible to people with disabilities (more than 10% of the population). Today, it’s good business and the ethical thing to do. Eventually, it will likely become a legal requirement.
  • Credible. Websites need to be credible – know the design elements that influence whether users trust and believe what we tell them.
  • Valuable. Our sites must deliver value to our end-users. For non-profits, the user experience must advance the mission. With for-profits, your site’s UX must contribute to the bottom line and improve customer satisfaction.

While you measure your site against the UX Honeycomb you should also look into your site analytics using a tool like Google Analytics to identify pages that have high bounce rates and review your site goal funnels to determine the areas of your site that need improvement. So, what do you do next?

Test Your UX

Once you identify area/s of your site using your analytics and the UX Honeycomb the next step is to begin improving your UX. However, You should test them using a tool like Optimizely or Visual Website Optimizer (VWO) before making changes.

This will provide you with the data to let you know if your change is helping or hurting your conversion rates, without making any permanent changes that may negatively impact your conversions. It’s a great quick and nimble way to analyze and get to know your customers better without the larger overhead and risk of making permanent changes to your site can take.

We here at Classy Llama have launched many A/B test campaigns and while most saw improvements to conversion there have been tests that didn’t prove to be as successful.
First, let’s take a look at one of our tests that didn’t win on the Roger’s Sporting Goods product detail page. Upon first glance, the page has a lot of information and it is tightly squeezed together, making it hard to know where to focus your eyes. We decided to run a test that organized the product information with more spacing so that it is easier on the eye. We tested the product title more prominently in the upper left, increased the font sizes, give the add to cart section a different background to draw the user’s attention in and place the pricing information prominently next to the cart area.

The test ran for just over 2 weeks and we were surprised with the results. The control outperformed the test with the test version seeing a -9.2% drop in conversion.

The reason I want to share this losing test campaign is to demonstrate just how important testing your ideas is and what a big impact it can have on your sites conversion rates. Imagine if we just went out of the gate with our ideas and didn’t test, resulting in lost sales and revenue – not good.

Even if your test doesn’t end up improving your conversion rates it is still important because every test that you perform helps you get to know your customers better. A/B testing isn’t just about winning or losing, it’s about better understanding your customers.

[cta connected_to=”post” prefix=”Related:” count=”1″][/cta]

Now let’s take a look at a test we ran on another product detail page for Marlow White:

Upon analyzing this page we found that the add to cart options were pushed down to the middle of the page making it so customers had to scroll down the page in order to select and add the product to their cart. If you take a look at our test version you can see we moved the product title to the top of the page along with the item number. We increased the size of product image and to the right you can easily select your product options, view pricing and add to cart. Below this you’ll find all the details and features in a simple tabbed content area.

In this case, our hypothesis that moving the product options, pricing and add to cart button up on the page would increase conversions proved to be true. This test outperformed the control by 2%.

You can easily see now how important testing your ideas is and how you can gain some great insight and data on the impact your changes make. Even the slightest change can result in a large improvement. 

The Numbers Game & Guidelines for Testing your UX

When running a test it is also important to allow your test to run for a long enough period of time to reach statistical significance. Tools like Optimizely will gather the data and tell you when your test has reached statistical significance and declare a winner. There are also some easy to use statistical significance calculators to help you determine on your own.

Another good rule of thumb, in addition to not calling the A/B test done too early, is allowing the variations to reach about 350-400 conversions each. While this number isn’t the magic number it’s a good guideline. You can also use a test sample size calculator so you can get a number that is better aligned for your site’s traffic and current conversion rates.

In Conclusion

Good UX and conversion rates are closely related, and you can’t have one without the other. With every element you test you’re going to learn more about your customers. Even if you don’t have a winning test it is important to remember you are still learning what your customers do (or don’t) want.

Good UX = Good Customer Experience = Conversions.

Classy Llama Supports Ride for Korah

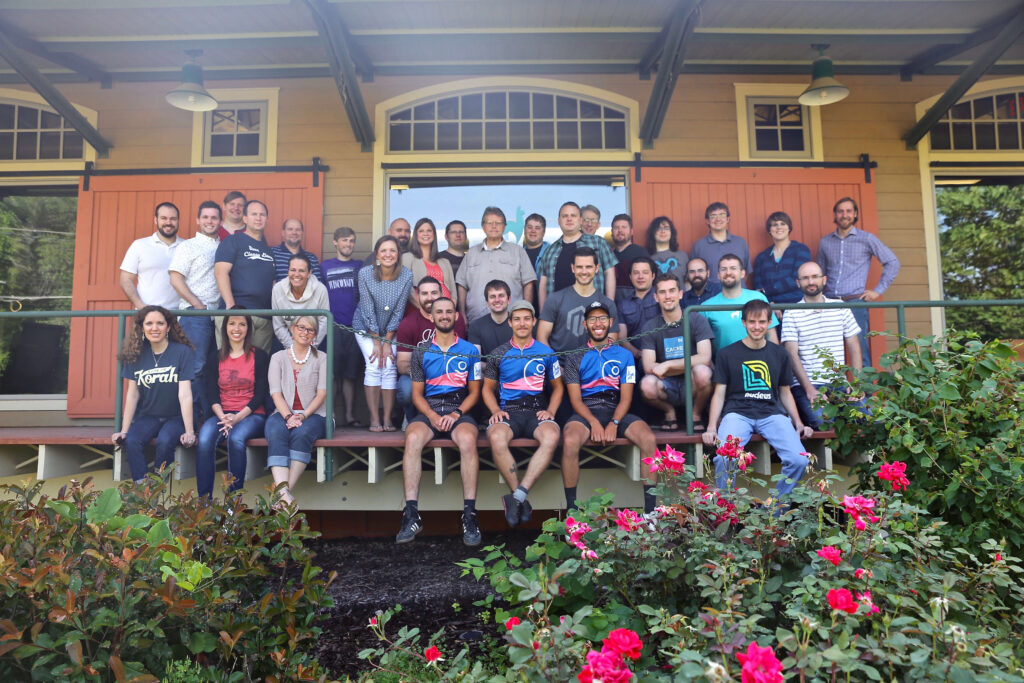
FOR IMMEDIATE RELEASE:
Classy Llama Supports Ride for Korah
SPRINGFIELD, MO (June 2016) – Company Sponsors Cross-Country Ride Raising Funds for Impoverished Families in Ethiopia  

Classy Llama is proud to announce their premier sponsorship of Ride for Korah, a cross-country cycling campaign founded with a mission to raise $50,000 for impoverished families in Korah, Ethiopia.  

The team of 3 friends, Jesse Tyler, Giancarlo Ospina, and Dakota Graff, departed from New York City in early May. The group will be bicycling across nearly 4,000 miles to reach their final destination of Seattle, WA. Tyler explains, “We saw dire need in the community of Korah and chose to use our abilities and resources to raise funds and awareness to help families there.”

Classy Llama is providing essential needs for the riders throughout their campaign. Expenses include food, shelter, and emergency provisions.

Ride for Korah has partnered with I Pour Life based in Springfield, MO. The funds they raise will support I Pour Life’s 10×10 program. The 10×10 program serves women living with leprosy and HIV, equipping them with essential life and business skills. Each woman will be taught a specific trade throughout the ten-month program and will learn to become self-sufficient. The cost for each woman to participate in the program is $1,000, which covers medical expenses, immediate basic living needs, education for children, and emergency reserve.

The sponsorship is part of Classy Llama’s ongoing commitment to supporting those in need.

Kurt Theobald, CEO explains, “Classy Llama invested in Ride For Korah because they carry the essence of our brand in all that they are doing. When you get to the very roots of our brand, it is all about loving the unlovely, pursuing the forgotten, mending the broken. In whatever we do, we want to create value – whether in lives of merchants, or the forgotten people of the landfill called Korah. What’s more, we love empowering others to realize their visions and pursue their dreams. This opportunity was a no-brainer for us; it fires on all cylinders.”

Press Contact:
Jayme Courtney
(417) 866-8887 ext. 109
[email protected]

###

About Classy Llama:
As a full-service eCommerce agency, we have the tools to help you build, grow, and support your Magento site. From full site builds and projects to marketing and site optimization, every engagement with Classy Llama is as unique as the needs of the businesses we serve. We pair high-efficiency, high-visibility processes with dedicated teams and some of the best Magento developers in the world.

About Ride for Korah:
Ride for Korah is a coast-to-coast cycling campaign focused on raising funds and awareness for I Pour Life’s women’s empowerment program in Korah, Ethiopia.

Custom Product Types in Magento 2

Overview

Magento supports a number of product types, each with its own behavior and attributes. This powerful concept allows Magento to support a wide range of industries and merchant needs by mixing and matching product experiences in their catalog.

Even more powerful, however, is the ability for developers to easily add new product types.

In general, when a product class has distinct behavior or attributes, it should be represented by its own product type. This allows the product type to have complex and custom logic and presentation, with no impact on other product types — ensuring that native product types can continue to function as intended.

Implementation

Config XML

As with most things in Magento, the first step to defining a custom product type involves an XML declaration. Specifically, in the <Vendor>/<Module>/etc/product_types.xml, add an XML snippet of the following form to declare the new product type’s critical information.

<?xml version="1.0"?>
<config xmlns_xsi="http://www.w3.org/2001/XMLSchema-instance" xsi_noNamespaceSchemaLocation="urn:magento:module:Magento_Catalog:etc/product_types.xsd">
    <type name="custom_product_type_code" label="Custom Product Type Label" modelInstance="VendorModuleModelProductType">
    </type>
</config>

The type node has three required attributes.

  • name: This attribute defines the custom product code which is used in code and in the database.
  • label: Defines the product type label in the Magento admin.
  • modelInstance: Specifies the fully qualified namespace of the corresponding product type model.

Although there are many other nodes and attributes that can influence the product type definition, this is an example of the simplest case.

Product Type Model

Having declared the product type, the next critical component is the product type model. Each product instance is associated with an instance of the corresponding product type model. This model has the opportunity to modify product type behavior and attributes and is called during many product manipulation processes.

Product Type Model Abstract

A product model must inherit from the MagentoCatalogModelProductTypeAbstractType base class. The base class has only one abstract method: deleteTypeSpecificData. This oddly specific method is called during a product instance save if its type has changed, and gives the original product type the opportunity to clean up any type-specific data before the type change is finalized.

Unless the new custom product type has such type-specific data, the method can be overridden with an empty method.

Finally, although not strictly required, it is conventional for product type models to include a constant with the name TYPE_CODE which defines the product type code string, so it can be referenced in code in a consistent manner.

<?php

namespace VendorModuleModelProduct;

class Type extends MagentoCatalogModelProductTypeAbstractType
{
    const TYPE_ID = 'custom_product_type_code';

    /**
     * {@inheritdoc}
     */
    public function deleteTypeSpecificData(MagentoCatalogModelProduct $product)
    {
        // method intentionally empty
    }
}

Core Product Types

It’s often the case that a custom product type behaves like and has similar requirements of a core product type. In this case, it can be convenient to extend one of the core product types instead of the abstract directly.

The following product type classes are available natively in the core.

  • Simple: MagentoCatalogModelProductTypeSimple
  • Virtual: MagentoCatalogModelProductTypeVirtual
  • Configurable: MagentoConfigurableProductModelProductTypeConfigurable
  • Grouped: MagentoGroupedProductModelProductTypeGrouped
  • Downloadable: MagentoDownloadableModelProductType
  • Bundle: MagentoBundleModelProductType
  • Giftcard (Enterprise Edition Only): MagentoGiftCardModelCatalogProductTypeGiftcard

Results

Once the product type is declared in XML and its associated product type model is created, products of the new type can be created in the admin.

m2 custom product type

Additional Steps

Having successfully created a new product type, there are some common (although optional) steps to fully utilize it.

Associate With Common Attributes

Since product attributes can be scoped to relevant product types, any core attributes which are already scoped will not apply to the new product type. Any such attributes which are indeed relevant will need to be associated with the new product type in an install data script.

<?php

namespace VendorModuleSetup;

use MagentoEavSetupEavSetup;
use MagentoEavSetupEavSetupFactory;
use MagentoFrameworkSetupInstallDataInterface;
use MagentoFrameworkSetupModuleContextInterface;
use MagentoFrameworkSetupModuleDataSetupInterface;

class InstallData implements InstallDataInterface
{
    /**
     * EAV setup factory
     *
     * @var EavSetupFactory
     */
    protected $eavSetupFactory;

    /**
     * Init
     *
     * @param EavSetupFactory $eavSetupFactory
     */
    public function __construct(EavSetupFactory $eavSetupFactory)
    {
        $this->eavSetupFactory = $eavSetupFactory;
    }

    /**
     * {@inheritdoc}
     */
    public function install(ModuleDataSetupInterface $setup, ModuleContextInterface $context)
    {
        /** @var EavSetup $eavSetup */
        $eavSetup = $this->eavSetupFactory->create(['setup' => $setup]);
        
        //associate these attributes with new product type
        $fieldList = [
            'price',
            'special_price',
            'special_from_date',
            'special_to_date',
            'minimal_price',
            'cost',
            'tier_price',
            'weight',
        ];

        // make these attributes applicable to new product type
        foreach ($fieldList as $field) {
            $applyTo = explode(
                ',',
                $eavSetup->getAttribute(MagentoCatalogModelProduct::ENTITY, $field, 'apply_to')
            );
            if (!in_array(VendorModuleModelProductType::TYPE_ID, $applyTo)) {
                $applyTo[] = VendorModuleModelProductType::TYPE_ID;
                $eavSetup->updateAttribute(
                    MagentoCatalogModelProduct::ENTITY,
                    $field,
                    'apply_to',
                    implode(',', $applyTo)
                );
            }
        }
    }
}

This example install script associates price and weight attributes in the $fieldList array with the new product type. Once this install script is run, these product attributes will show in the admin when editing or creating a product of the new type.

Composite Products

When adding child products to a composite product type (grouped, configurable or bundle), the admin interface will only show products where the associated product type has explicitly declared its eligibility to be the child of a composite product. New product types can allow themselves to be children of composite product types by adding a node to the composableTypes node in Vendor/Module/etc/product_types.xml .

<?xml version="1.0"?>
<config xmlns_xsi="http://www.w3.org/2001/XMLSchema-instance" xsi_noNamespaceSchemaLocation="urn:magento:module:Magento_Catalog:etc/product_types.xsd">
    <type name="custom_product_type_code" label="Custom Product Type Label" modelInstance="VendorModuleModelProductType">
    </type>
    <composableTypes>
        <type name="custom_product_type_code" />
    </composableTypes>
</config>

Where To Go From Here

Creating a new product type is only the beginning. Now that it’s defined, the new product type provides an enormous capacity for scoped customization.

Product Type Model Methods

The behavior of products can be significantly influenced by overriding methods in the product type model. This allows custom behaviors to be encapsulated within the product type rather than global observers/plugins.

Some examples of such methods:

  • beforeSave() and save(): these methods run during the beforeSave() and afterSave(), respectively, methods of products of the given type.
  • isSalable(): allows a custom product type to customize product saleability.
  • _prepareProduct(): provides a hook to interact with the info by request when a product is initially added to the cart.

Price Model

In addition to the product type model, a module can specify a price model in the product type definition XML.

<?xml version="1.0"?>
<config xmlns_xsi="http://www.w3.org/2001/XMLSchema-instance" xsi_noNamespaceSchemaLocation="urn:magento:module:Magento_Catalog:etc/product_types.xsd">
    <type name="custom_product_type_code" label="Custom Product Type Label" modelInstance="VendorModuleModelProductType">
    <priceModel instance="VendorModuleModelProductPrice" />
    </type>
</config>

The price model referenced should extend MagentoCatalogModelProductTypePrice. This class has no abstract methods which must be implemented, but allows extending classes to interact with nearly every aspect of price calculation.

Summary

By providing a framework for defining custom product types, Magento empowers merchants and developers to implement significant customization to facilitate business requirements without risking default product behavior.

Why ROI Doesn’t Matter

As marketers, we all are justifying the work we do based on how the data relates to the organization’s return on investment. We know we have to project an estimated ROI before a project even begins and monitor it closely. And if that goal isn’t hit, the project is often deemed a failure. I get it. Money is being spent and stakeholders want to know that it’s not just going down the drain. Data. Analytics. Measure, measure, measure. That thinking is wrong. At least when referring to branding. How do you measure, in dollars, the brand experience? You can’t. And you shouldn’t.

Are you feeling a small panic attack coming on? Maybe questioning my sanity? Let me explain.

Recently at IRCE (Internet Retailer Conference + Exhibition), we handed out a LOT of plush llamas and superhero capes and masks. I was constantly being asked at the event – how do you measure the ROI? The answer: we don’t.

We don’t measure it. We don’t try to calculate it. We don’t worry about clear-cut ROI.

Our company culture is about love, and joy, and families. It’s about giving, not receiving. Some of these people may never be a Classy Kind in Classy CapeLlama customer. And that’s okay.

But if you want to look at this in terms of business, in so many ways this does come back to us. They tweet. They post. They tag. They spread our values around:  the LOVE and the JOY. It causes even our competitors to market for us. All for the cost of an $8 plush, we get photos on 3+ forms of social media all talking about how great we are.  Why?  Because people value the same things we do and recognize the genuineness of our expression.  So I ask you again – How do you measure, in dollars, the brand experience?

Some forms of marketing efforts we do measure; paid search, for example. We track and adjust, we pause and increase budgets, and we drop ads based on CTR and conversions just like any “normal” marketing initiative.

We’re just expressing who we are and loving people, regardless of whether they receive it as love, regardless of whether they think we’re just trying to creatively get into their wallets. We love. Because it’s who we are. So you can’t put a price on living free from who you are and loving others without reservation. It’s not even about our company or brand. The brand is just a vessel through which we do this. But our team does this in their own personal lives, too, when there’s no brand attached to it, often anonymously when not even their own name is at stake.

What’s the point of being in business if we have to hide who we are and beat the same drum as everyone else? Why would we spend the grand majority of our productive time hiding our values, our identity, and ultimately, the things that really set us apart from the rest? It’s like singing the same song as everyone else: It’s certainly not going to get you noticed, and it’s not embracing the reality that you, as a brand, have your own song to sing. Sing YOUR song. Be honorably dissonant from the rest.

And if you do, you’ll find that you either learn a lot about how you can improve or you’ll gain some hardcore raving fans, which are the hardest kind to come by.

So when you are having a brainstorming session trying to think about your next big-budget marketing initiative, first stop and think about your company culture. How do you represent that culture? You most likely can’t do that with an ad. Ads only talk about WHAT you do, not WHO you are. And if you do talk about who you are, it sounds cliche (like “we have great customer service” for example). Who you are is far more important, because we all have competitors that do what we do. Represent your culture and THAT will set you apart. And at the end of the day, isn’t that what marketing is supposed to be?

Doesn’t seem so crazy now, does it?

Happy kid with swagAdult superheroesbaby superheroLouie and Godiva

Magento Releases 2.1

Rob Tull, Classy Llama’s Director of Solutions, discusses the Magento 2.1 release “Magento 2.1 greatly improves the search experience for Magento 2 stores. It also gives marketers and content creators a greatly expanded feature set for creating and previewing content. You’ll have the ability with Magento 2.1 to directly manage marketing campaigns including multiple components and preview the impact of those campaigns ahead of their actual launch. It also makes the process for customers to pay with PayPal much simpler, reducing barriers to conversion.”

Highlights of Magento Enterprise 2.1:

Behind every great shopping experience is a team of innovative marketers and merchandisers. They optimize website content, merchandise products, and create awesome marketing campaigns and promotions. But what if you could empower your team to create new shopping experiences faster and easier than ever before?

Magento Enterprise Edition 2.1 gives you that power.

  • Supercharge sales and improve productivity like never before with new Content Staging and Preview
  • Drive Sales and Improve Productivity
  • Boost Conversion Rates
  • Simplify PCI Compliance
  • Scale for Growth
  • Improve Your Management Experience
  • Deploy in the Magento Cloud

For more detailed information, read here.

Deploying Magento 2 Using Capistrano

This post was originally posted on David Alger’s blog.

Overview

This article will cover how to use the capistrano-magento2 Capistrano Gem (created by our very own David Alger) to deploy Magento 2 to stage and/or production servers.

Capistrano is a tool used to run scripts on multiple servers, typically with the purpose of deploying code changes to those servers. Capistrano works well with both single node deployments as well as multiple node deployments that include separate application and database servers sitting behind a load balancer. When you use Capistrano, you get a lot of functionality “for free” and you only need to implement scripts to handle your application-specific deployment steps.

The Magento community has been using Capistrano to deploy Magento 1 for many years. There are a couple of Capistrano Gems for Magento 1 (capistrano-magento by Peter Rhoades and Magentify by Alistair Stead). However, since Magento 1 was fairly simple to deploy (compared to Magento 2), many merchants and agencies didn’t use a deployment tool like Capistrano. However, Magento 2’s deployment requirements are greater and it is necessary to have some sort of scripted process to deploy Magento 2 updates. Rather than building your own deployment scripts from scratch, it makes sense to use an open source community tool that is time-tested and used by many developers.

A Capistrano deployment can be initiated from any machine with Capistrano installed and the proper configuration files in place. When Capistrano deploys changes, it connects via SSH to the configured server(s) and runs the necessary commands to deploy a new revision of the project. The typical workflow is to run the deploy command from your local development machine. Deployment configuration files are typically committed to the Magento repository. That way, any developer working on the project can deploy changes to a configured environment assuming they have the appropriate SSH access.

Prepare your Magento 2 project/repo

This article assumes the following:

  • You’ve chosen the “Composer metapackage” method of installing Magento.
  • You have a copy of Magento 2 that you’ve installed locally (or on a non-Capistrano enabled stage server) and you’d like to deploy it to the stage and/or production environments using Capistrano.
  • You have a Git repo that contains composer.lock and composer.json files that were created when you installed Magento using composer create-project. Your .gitignore should look something like this: magento2-community-edition/blob/master/.gitignore See the first few paragraphs of Alan Kent’s blog post for more details regarding this project setup approach.
  • You have a Magento 2 database dump that you’re able to import into the server(s) on which you’re going to deploy to using Capistrano. capistrano-magento2 does not support deploying a Magento 2 application from an uninstalled state and assumes a working database and the app/etc/env.php and app/etc/config.php files exist on the target environment (more on this later).

Installation

To install Capistrano, run this command:

$ gem install capistrano

See this page if you run into issues: http://capistranorb.com/documentation/getting-started/installation/

To install capistrano-magento2, run this command:

$ gem install capistrano-magento2

Install Capistrano in your Magento 2 project

Follow steps 1-3 in this section of the
capistrano-magento2 readme. Once you follow these steps, the tools directory in your Magento 2 project should look like this:

.
└── tools
    └── cap
        ├── Capfile
        ├── config
        │   ├── deploy
        │   │   ├── production.rb
        │   │   └── staging.rb
        │   └── deploy.rb
        └── lib
            └── capistrano
                └── tasks

I recommend committing these files to your Magento 2 Git repo.

Prepare your application server(s)

Before you deploy, you need to prepare your stage and/or production environments. For the purpose of this article, let’s assume that you are going to deploy Magento 2 to two environments:

  • www.example.com
  • stage.example.com

Classy Llama uses Capistrano to deploy to both production and stage environments. While we could get away with deploying to stage manually (especially if stage is running in developer mode, which I don’t recommend), using the same deployment process in both environments ensures that your stage environment is an accurate reflection of production.

For the rest of this article, we’re going to talk about deploying to the stage.example.com environment, but the steps will be identical to the production environment. Here is an example of the commands that you would need to run to prepare the stage.example.com environment:

$ ssh [email protected]
$ cd /var/www/html
$ mkdir -p shared/app/etc
$ touch shared/app/etc/env.php

The capistrano-magento2 gem deploys files using the ownership of the SSH user that is used to connect to the server. In order to avoid permissions issues, you should ensure PHP and your web server is running as that user. While it is considered best practice to run your stage and production sites on separate servers, Capistrano doesn’t care about this can be easily configured to deploy stage/production to the same server by changing the config values in the tools/cap/config/deploy/*.rb files.

Edit the shared/app/etc/env.php file and add the necessary settings (DB credentials, etc) and ensure a proper app/etc/config.php file is committed to your repository (this file is created when bin/magento setup:install is run). Now import the Magento database and update the necessary values in the core_config_data table to reflect the new URL.

Configure your web server to use /var/www/html/current/pub as the document root. If your web server is running Apache, make sure you have mod_realdoc installed and configured to avoid issues with symlinked deployments and the Zend Opcache. If your web server is running Nginx, make sure your FastCGI proxy configuration is using the $realpath_root variable instead of $document_root for both SCRIPT_FILENAME and DOCUMENT_ROOT params sent to PHP-FPM.

fastcgi_param  SCRIPT_FILENAME  $realpath_root$fastcgi_script_name;
fastcgi_param  DOCUMENT_ROOT    $realpath_root;

First deployment to stage

Now you can deploy Capistrano to your server. On your development machine, run this command in the tools/cap directory:

$ cap staging deploy

When you run that command, Capistrano will verbosely report on its progress. Here is a summary of what Capistrano does in this process:

  • Creates a new /var/www/html/releases/<TIMESTAMP> directory for the new release
  • Checks outs the latest copy of the develop branch (the :branch value specified in staging.rb)
  • Symlinks the :linked_files and :linked_dirs into the new release folder
  • Runs composer install in the release directory. This will download and install the dozens of dependencies declared in composer.lock. Composer caches packages, so subsequent deployments should be faster than your initial deployment.
  • Changes directory/file permissions in the new release folder to 770/660, respectively (these may be updated in future releases of the capistrano-magento2 gem to be further secured by default, and also allow for greater configurability).
  • Runs bin/magento setup:static-content:deploy and bin/magento setup:di:compile-multi-tenant
  • Once all of those commands run, the new release directory will be nearly ready to be switched to the “current” release. However immediately before doing so, the current release (the “current” symlink) will be put into maintenance mode using bin/magento maintenance:enable. The reason this is done is because the bin/magento setup:upgrade --keep-generated command will be run immediately after the site is put into maintenance mode. This is important because any new or updated modules will have their version numbers updated in the setup_module table and if the current release sees that its modules aren’t in sync with that table, it will throw an error.
  • Capistrano deployments are atomic, so if any of the commands up to this point failed, the deployment will fail and the /var/www/html/current symlink will continue to point to the release directory it was pointed to before you began the deployment.
  • At this point, the /var/www/html/current symlink will be switched to point to the new releases/XXXXXXXX directory.
  • Flushes cache via bin/magento cache:flush

The deploy process implemented for deployment of Magento 2 by the capistrano-magento2 Gem can be seen in lib/capistrano/tasks/deploy.rake

If you completed all of the previous steps properly, you should now be able to browse to http://stage.example.com and see your newly deployed Magento site. When you want to deploy future code changes to stage, ensure the changes are in the develop branch and run the cap staging deploy command again to deploy the latest changes to stage.

Once you deploy to stage, the /var/www/html directory on your stage server should look something like this:

.
├── current -> /var/www/html/releases/20160526030129
├── releases - this directory will contain the latest X releases. X is defined by :keep_releases which defaults to 5
│   └── 20160526030129
├── repo - this is a bare clone of your Git repository
├── revisions.log - a line for each release with the commit hash, release date, and username of the machine that deployed
└── shared - this is a permanent directory that contains the files/directories referenced by :linked_files and :linked_dirs
    ├── app
    │   └── etc
    │       └── env.php
    ├── pub
    │   ├── media
    │   └── sitemap.xml
    └── var
        ├── backups
        ├── composer_home
        ├── importexport
        ├── import_history
        ├── log
        ├── session
        └── tmp

Now that your stage deployment is configured, follow the same steps to setup your production deployment.

Additional capistrano-magento2 Features

In addition to deploying changes, the capistrano-magento2 Gem also supports a number of Magento maintenance commands. Run cap -T in the tools/cap directory to see a list of commands. Many of the commands are simply aliases for bin/magento commands. The benefit of running them from Capistrano is two-fold: You don’t need to SSH into your stage or production server in order to run the command, as Capistrano handles that for you. Secondly, if you have multiple application servers, you can run a single command in all of your application servers simultaneously. These are the commands available in version 0.2.4 of capistrano-magento2:

cap magento:cache:clean                   # Clean Magento cache by types
cap magento:cache:disable                 # Disable Magento cache
cap magento:cache:enable                  # Enable Magento cache
cap magento:cache:flush                   # Flush Magento cache storage
cap magento:cache:status                  # Check Magento cache enabled status
cap magento:cache:varnish:ban             # Add ban to Varnish for url(s)
cap magento:composer:install              # Run composer install
cap magento:indexer:info                  # Shows allowed indexers
cap magento:indexer:reindex               # Reindex data by all indexers
cap magento:indexer:set-mode[mode,index]  # Sets mode of all indexers
cap magento:indexer:show-mode[index]      # Shows mode of all indexers
cap magento:indexer:status                # Shows status of all indexers
cap magento:maintenance:allow-ips[ip]     # Sets maintenance mode exempt IPs
cap magento:maintenance:disable           # Disable maintenance mode
cap magento:maintenance:enable            # Enable maintenance mode
cap magento:maintenance:status            # Displays maintenance mode status
cap magento:setup:di:compile              # Runs dependency injection compilation routine
cap magento:setup:permissions             # Sets proper permissions on application
cap magento:setup:static-content:deploy   # Deploys static view files
cap magento:setup:upgrade                 # Run the Magento upgrade process

Reverting

Capistrano supports reverting to previous releases using cap deploy:rollback. This can be useful if you mistakenly deploy code to an environment and want to immediately revert it. However, if you want to use this feature, there are some things you need to be aware of:

  • If your newest release contained new extensions or newer versions of extensions, you’ll need to manually adjust the values in the setup_module table or else you will get errors.
  • If a deployment fails or you cancel it, the releases/<TIMESTAMP> directory for that failed release will still exist. If you rollback, Capistrano will use the most recent release directory, even if it was not a successful deploy.
  • After reverting, you’ll need to run the cap magento:cache:flush command
  • I’ve only used this command once, so there may be other things you need to do that I’m not listing here.

OS X notifications

If you’d like to get OS X notifications of successful/failed deployments, follow the steps outlined under “Terminal Notifier on OS X” in the README

magento2-capistrano-notifications

Review pending changes before deploying

If you want to see what changes you’re about to deploy to an environment, you can add the capistrano-pending gem as a dependency. Add this line to tools/cap/Capfile:

require 'capistrano-pending'

Now, cd to tools/cap and run these commands to see pending commit messages and file changes (respectively):

$ cap stage deploy:pending
$ cap stage deploy:pending:diff

Flushing Varnish cache

If you’re using Varnish to cache your static assets, you’ll need to take some extra steps to get capistrano-magento2 to flush Varnish. I’m not going to cover those steps in this article, but if you’d like to learn more, feel free to post a comment below.

Summary

It can take a while to get familiar with and setup an automated deployment system, but due to the amount of effort required to manually deploy changes to stage/production environments with Magento 2, the payoff should be worth the investment. Especially because deploying with Capistrano ensures a minimal amount of site downtime when deploying.

If you have any questions or feedback, I’d love to hear them in the comments section below.

Contact Us